Barcodes
Cases and evidence can carry a barcode in a Barcode field. Scan a barcode to jump straight to its case or evidence item.
Barcode fields
- Add a Barcode field to a case or evidence form in the Form Builder.
- With Barcode Source set to
Manual(see below), choose either:- Scan Existing: scan or type the code from an existing label.
- Create New: generate a new code. This replaces the old code when you save.
- A code that doesn't fit the barcode type can't be saved, and Barcode already exists. is shown for a code already in use.
- When viewing a record, click the barcode (or press Enter on it) to copy its number. xBit shows Copied.

- Scan Existing enters a code from a label.
- Create New generates a code.
Set the symbology with Barcode Type in Admin > About / Settings, General tab. The default is Code 128.
Choose where barcodes come from
Go to Admin > Form Builder, open Case Information or Evidence Intake, and edit the Barcode field.
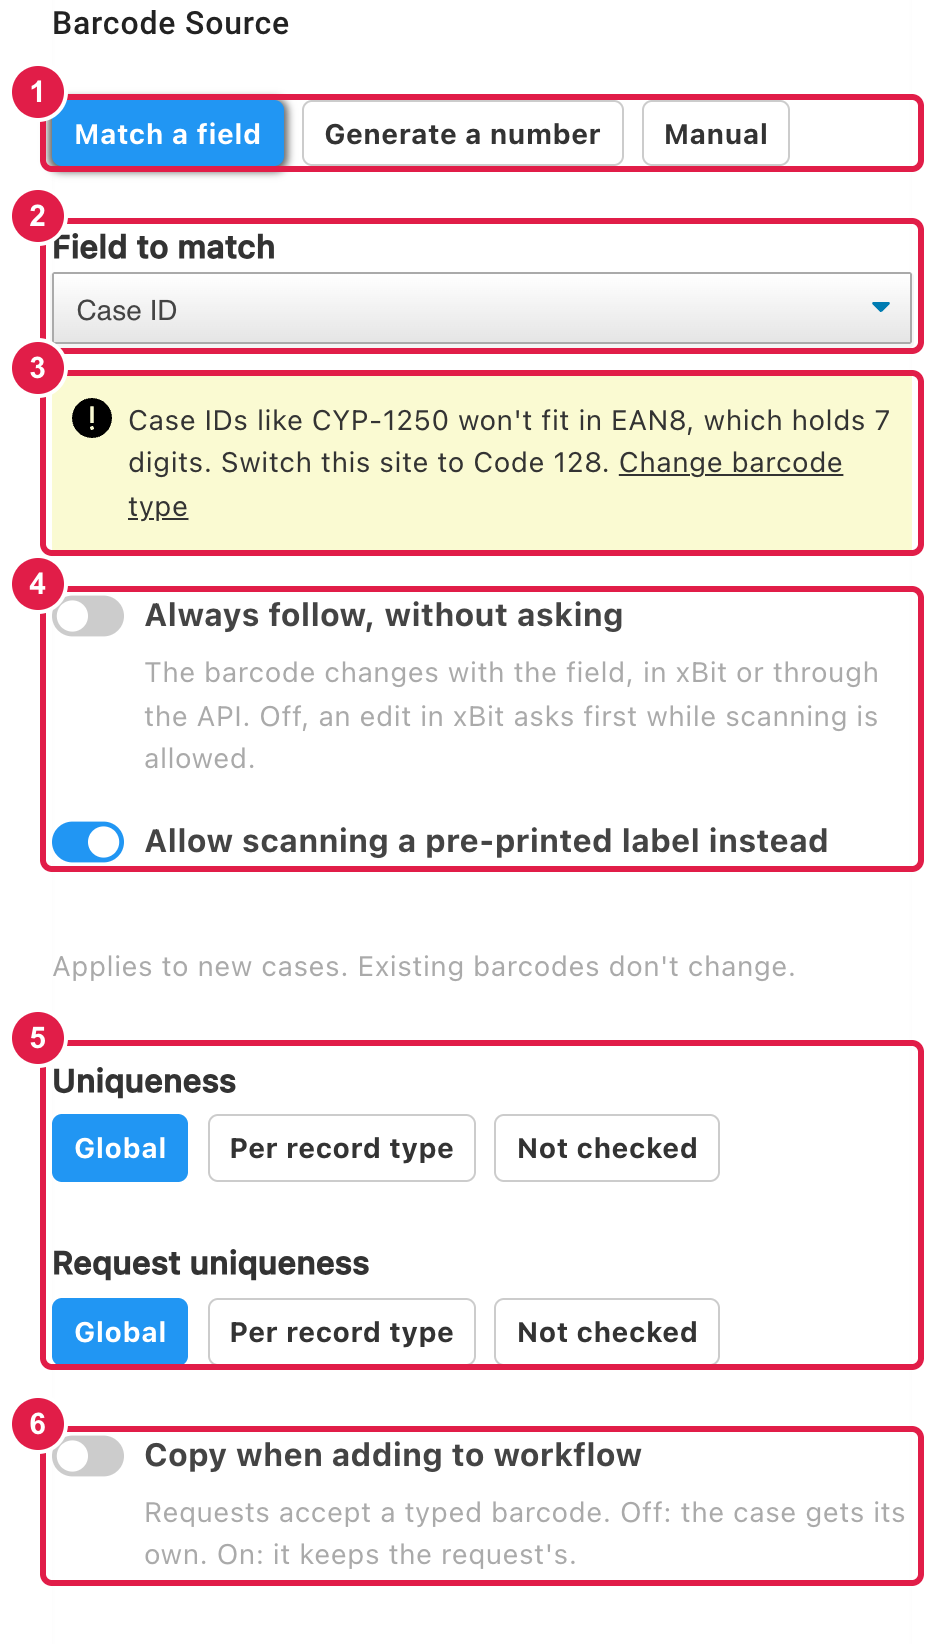
- Barcode Source:
Match a field: the barcode is the record's Case ID or Evidence ID.Generate a number: xBit assigns a unique number.Manual(default): users chooseCreate NeworScan Existingon the form. Nothing is automatic.
- Field to match: the ID the barcode follows.
- Barcode type warning: shown when your IDs won't fit the site's barcode type (for example, letters in an EAN8 site). Click
Change barcode typeto switch, usually to Code 128. - Changes to the ID:
- Always follow, without asking (off by default): the barcode changes with the ID, in xBit or through the API. Off, an edit in xBit asks first.
- Allow scanning a pre-printed label instead: keeps
Scan Existing, for agencies with pre-printed bags.
- Uniqueness:
Global,Per record typeorNot checked. Requests have their own Request uniqueness. - Copy when adding to workflow: on, the case or evidence keeps the request's barcode; off, it gets its own.
With Match a field or Generate a number, every new case and evidence item gets its barcode as it is created, including those from lab requests and the API.
The setting applies to new records; existing barcodes don't change.
Add barcodes to existing records
After saving the field, click Generate barcodes for N cases without one (or evidence items).
- Only empty barcodes are filled, and nothing is printed.
- When it finishes, it lists any records it skipped and why, for example an empty ID.
Barcodes stay unique
- A duplicate barcode is refused wherever it's entered: in xBit, the lab submission portal or the API. It stays in the field, marked invalid, so it can be corrected.
- Not checked turns this off for the field.
- Admins see a Duplicate Barcodes report in the
Issuesmenu while existing records share a barcode. - Scanning a barcode that several records share asks which one to open.
When an ID changes
If a Case ID or Evidence ID changes and the barcode matches it, xBit asks Update the barcode too?, since labels already printed would stop scanning.
Update the barcodechanges it to the new ID.Keep(followed by the old barcode) leaves it unchanged.
Scan a barcode
- Click the barcode icon (Scan) in the top navigation.
- With the cursor in the text box, scan the barcode. A USB scanner that types the code and presses Enter works; you can also type the code and press Enter.
- The barcode icon opens Scan.

- Put the cursor in the text box before scanning.
What happens next:
| Result | xBit |
|---|---|
| Matches evidence | Opens the evidence item. |
| Matches a case | Opens the case dashboard. |
| You can't access the case | Says so. Ask an Admin for case access. |
| Several records share it | Shows This barcode is on more than one record. Choose the one you meant. |
| An old barcode | Shows No record has this barcode now with the records that held it and until when, so an old label still leads to its record. |
| No match | Shows Barcode not found with New Case and New Evidence. Either opens a new form with the barcode already filled in. Press Esc to cancel. |
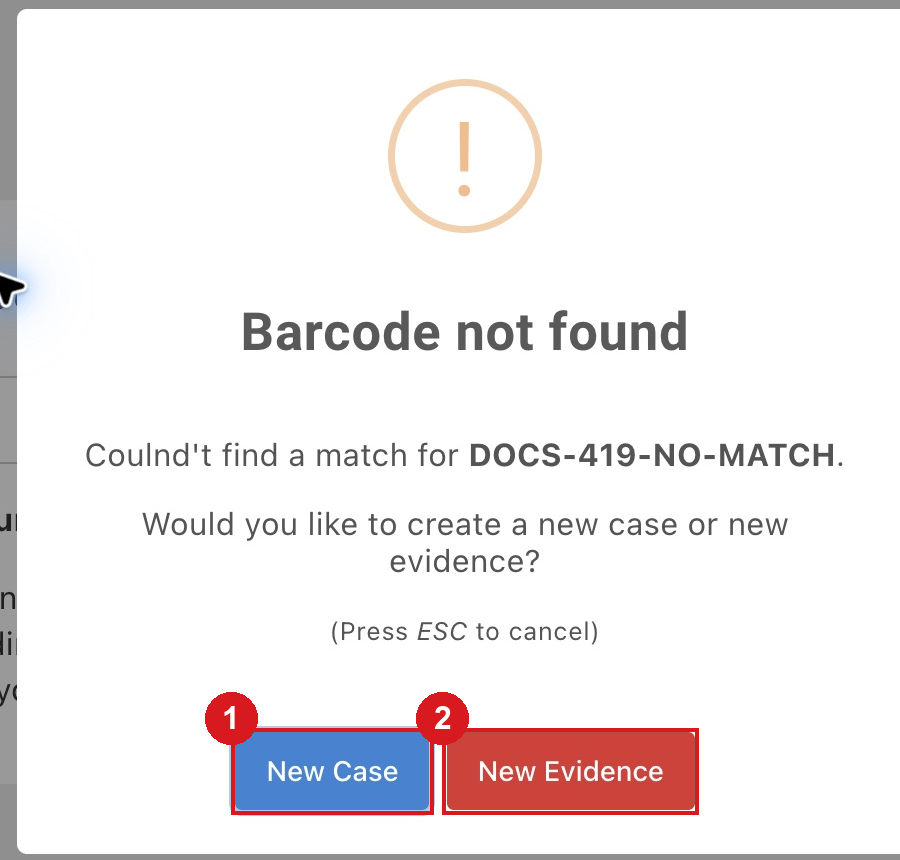
- New Case opens the case form.
- New Evidence opens the evidence form.
Printing labels without a barcode
When a label includes a barcode and the record has none yet, xBit asks first:
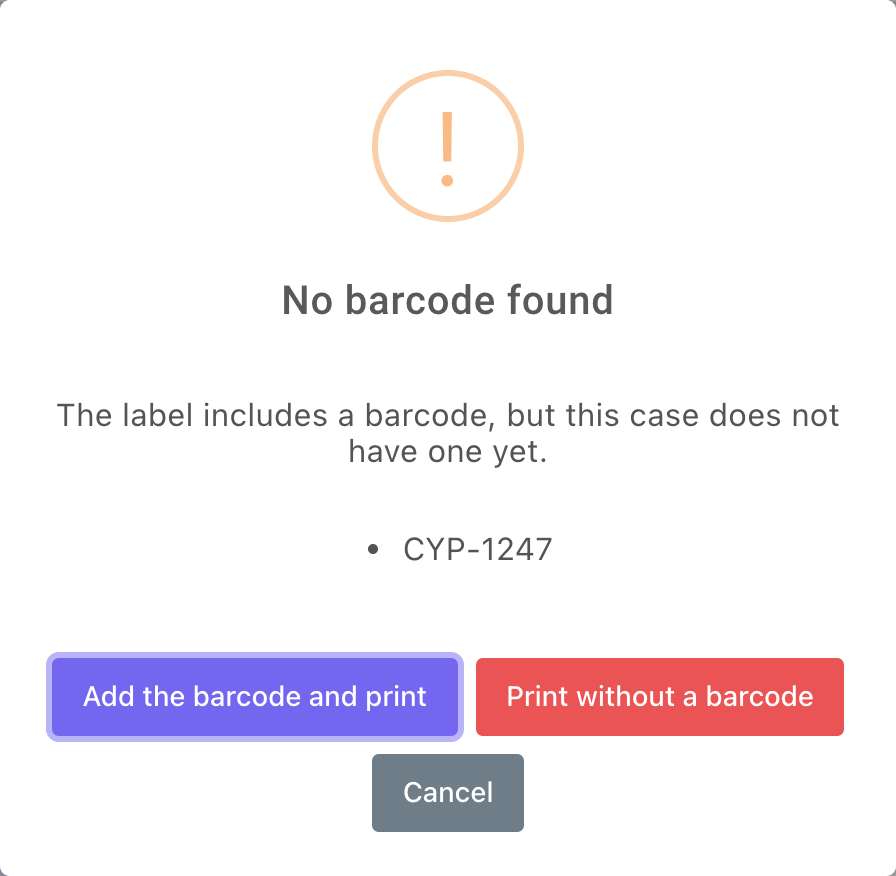
Add the barcode and printadds it using the Barcode Source, then prints.Print without a barcodeprints as before.
This works for the case and evidence label buttons and for bulk label printing. See Label Builder.