List Manager
Configure your agency LIST Manager. Some of the default options for dropdowns within xBit may not be appropriate for your agency/organization or you may want to use your own verbiage. These configurable Lists will allow you to customize the usable options. You can access by clicking on Admin in the top Navigation bar and then List Manager.
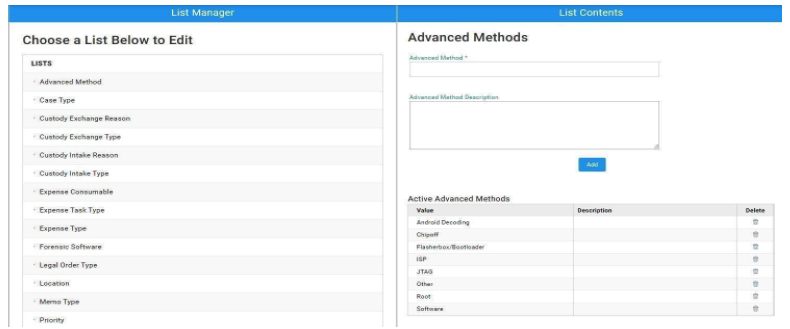
For example, in case types, you may not do any arson or robbery investigations, but you do a lot of work with cybercrimes. You can edit the lists to reflect the needs of your organization through various inputs such as Advanced Forensic Method, Custody Exchange Types, and Priority types. These can be changed at any time, though you cannot remove an entry if a case or evidence item is currently using it (even if closed).
You can add or remove values from various dropdowns including:
- Advanced Method – (CAIS, Chipoff, ISP, etc.) Found when viewing / editing the evidence page.
- Case Type – (civil code, state code or a federal statute). Seen as offense type for a case on the dashboard and when viewing / editing the case page.
- Case Status Type – Configure the statuses used throughout the case lifecycle and the rules that automatically transition cases between statuses.
- Custody Exchange Reason – preset purposes of moving evidence. Seen on an evidence page when adding a new chain of custody.
- Custody Exchange Type – Charge into custody or out of current custody. Seen on an evidence page when adding a new chain of custody.
- Custody Intake Reason – Chain-of-Custody (COC) entry types as demanded by established operating procedures. Seen when creating a new piece of evidence.
- Custody Intake Type – Can be defined for Agency types of initial booking of evidence. Seen when creating a new piece of evidence.
- Expense Consumable – Seen on the expenses tab of your case dashboard.
- Expense Task Type – Define the type of Expenses being itemized. Seen on the expenses tab of your case dashboard.
- Expense Type – (shipping, external hard drives, discs, USB drives, etc). Seen on the expenses tab of your case dashboard.
- Forensic Software – Select what programs and tools you utilize; hide those you do not from view. Seen in Evidence entry page and populates Stats.
- Legal Order Type – (search warrant, consent, abandoned, etc). Seen when adding new evidence or viewing / editing an evidence page.
- Location – Preset Known storage locations for ease of entry. Seen on Chain of Custody and Evidence pages.
- Memo Type – Types of fields for labeling Memos (case notes) Seen in the memo tab of your case dashboard.
- Priority – Define the priority of the case or evidence item. Seen when adding a new case or viewing / editing a case page.
- Reason for Required Date – Define a deadline to be completed by. Seen when adding a new case or viewing / editing a case page.
Case Status Types
Administrators can manage Case Status Types by going to Admin > List Manager > Case Status Type.
From here, administrators can:
- Create, edit, enable, or disable custom Case Status Types.
- Rename system status labels, such as changing Active to Engaged.
- Add descriptions and tooltips.
- Choose which statuses are available when creating a case.
- Select the default initial status for new cases.
- Configure automatic status transitions and their audit notes.
Custom statuses are based on one of xBit's core classifications: Active, Admin Reviewed, Completed, Hold, Inactive, Peer Reviewed, or Pending Review. A custom status follows the behavior of its selected core classification while using your organization's preferred name and configuration.
For example, an administrator could create a Reopened status based on Active, then configure a rule that applies it when evidence is added to a case.
Case Status Transition Rules
Case Status Transition Rules determine how a case's status changes when workflow events occur, including:
- A new case is created.
- Evidence is added directly to a case.
- A new Request Submission is added to the workflow.
- An existing case is updated from a Request Submission.
The current transition-rule interface lets administrators choose the destination status, restrict a rule to specific starting statuses, and customize the audit-note template. Available variables and a live preview show how the resulting Status History entry will appear.
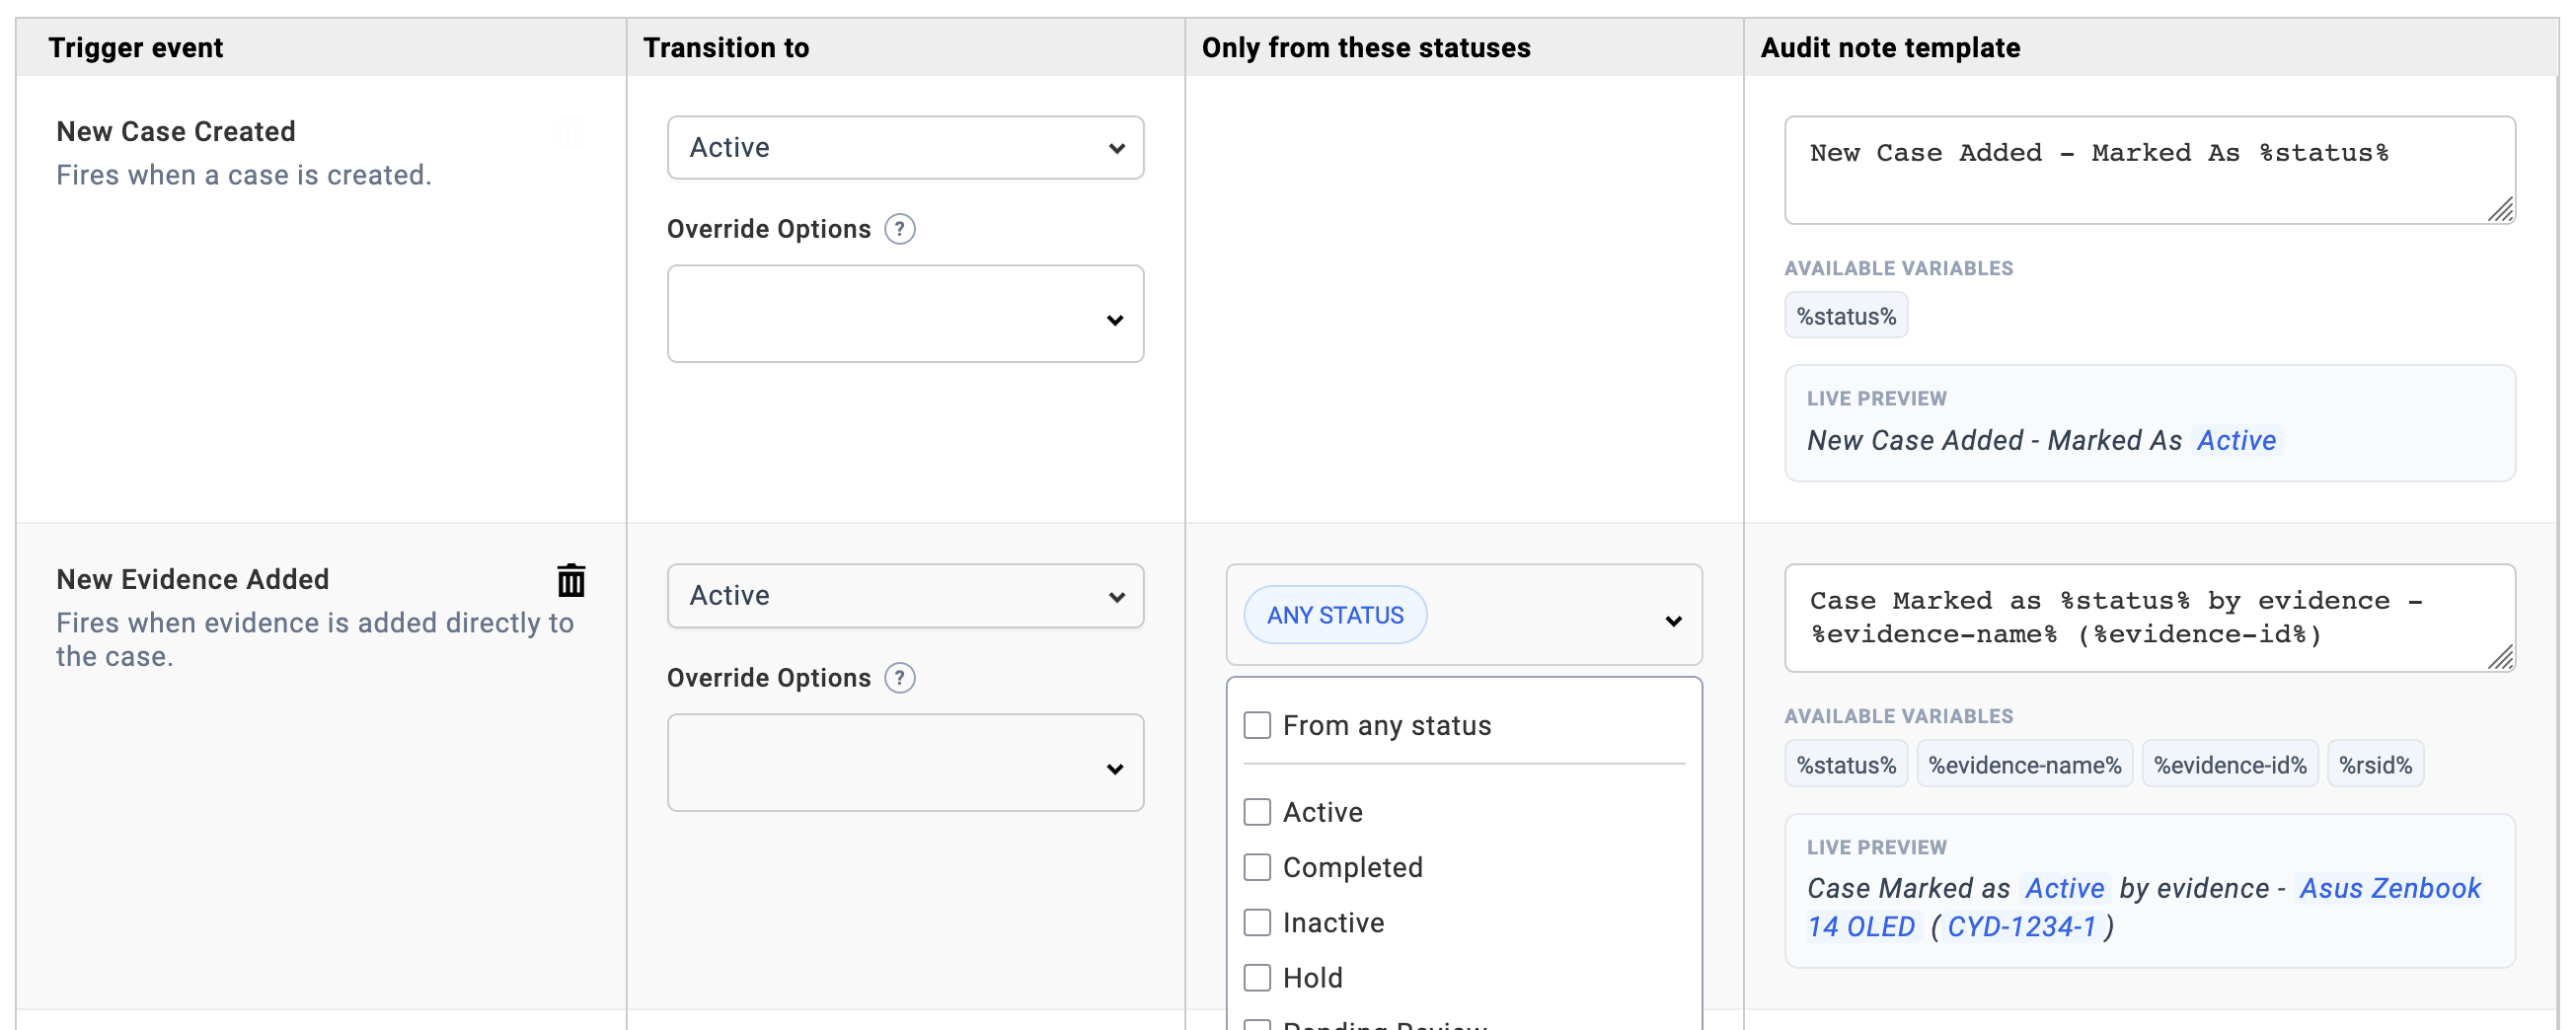
These controls can be used to define how evidence affects a closed case and how cases move into the appropriate status as work enters the system.
Statuses on the New Case Form
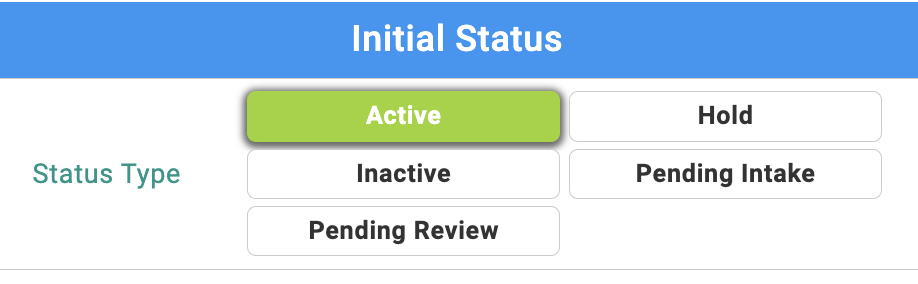
Enable Allow In New Case Form for each status users should be able to select while creating a case. One of these statuses can be configured as the default selection.
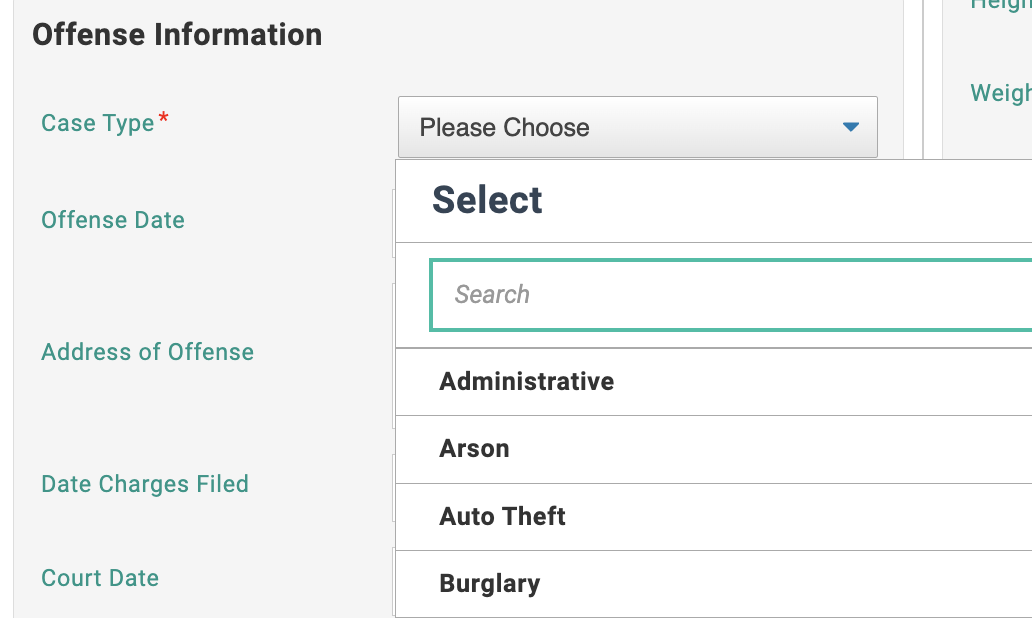
The Case Type dropdown on the New Case form includes a search box, making values easier to find when the list contains many case types.
Case Status History
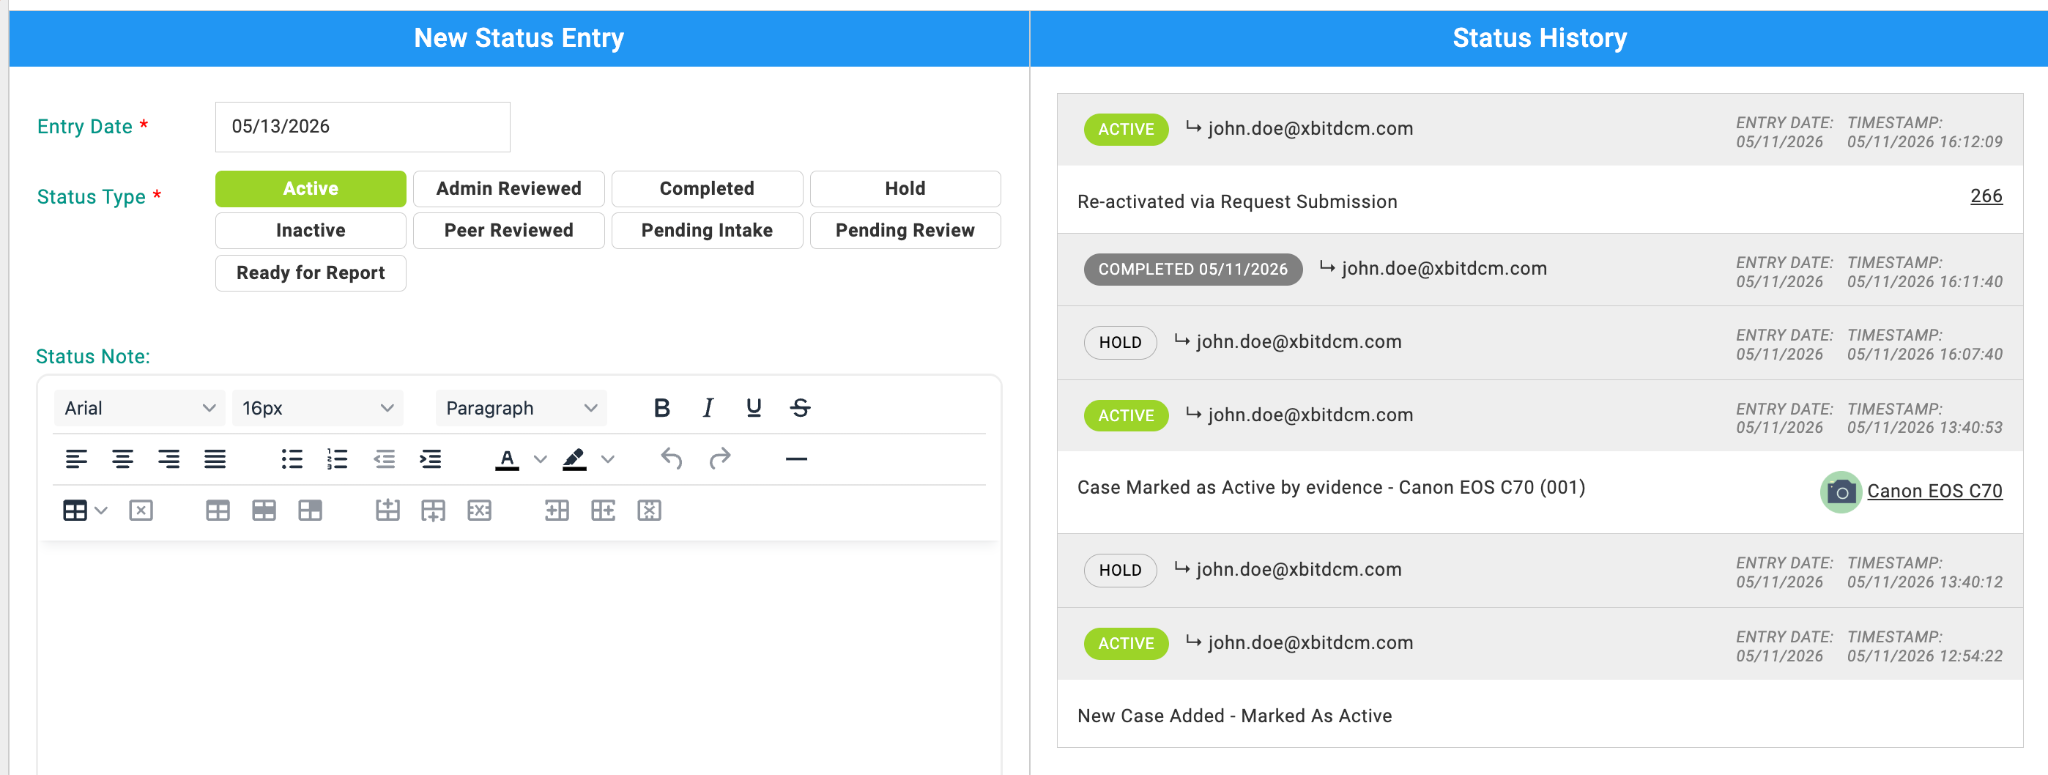
Status History records status changes and the workflow actions that caused them. When a change is triggered by new evidence or a Request Submission, the history entry links to the related evidence item or request so users can open it directly.
xBit is now prepared for your case entries. Training is free with all purchases and can assist with the workflow, utilizing features and general troubleshooting. Please let us know when you are ready.
Optional Setup
-
Department/ Unit Manager: You can access by clicking on Admin in the top Navigation bar and then Departments/ Units. This dropdown will appear when noting an Expense and on the Lab Submission form. Create categories for the Type of agency this is associated to or create new Department/ Units.
-
Asset Manager Configurations: Asset Manager can be found on the top navigation bar. The Asset Manager has been improved to include Filters and the ability to add non-licensed users as asset holders.