Case and Evidence Screens
Every case opens on its Case Dashboard. Click an evidence card there to open the View Evidence screen for that item.
For charts across all cases, see Case and Evidence Stats.
| Who | Can |
|---|---|
| Admin | Everything on this page, on cases they can see; Read Only and the evidence Sort |
| Examiner, Analyst with Read/Write | Add and edit on cases they can see |
| Analyst with Read Only, Viewer | Open and read cases they can see; no New menu, Edit buttons or assignments |
Who can see a case is set in Case Permissions & Assignments; see Managing Read-only Users.
Case Dashboard
Header and case menu
The same header and menu show on every page of a case, including View Evidence.

- The case ID.
- The case status. Click it to open Status; hover to read the status note.
- The deadline tag, such as OVERDUE and how many days.
- The case menu (see below).
- New: add a Case, Evidence, Memo, Expense or Upload. Only shown to users who can edit the case.
| Menu item | Opens |
|---|---|
| Dashboard | This page. |
| Status | The case status page (see Change the case status). |
| Evidence | The case's evidence list. With Chain of Custody or reviews on, it's a menu: Case Evidence, your evidence views and Bulk Chain of Custody; see Table View and Chain of Custody. |
| Memos, Expenses, Uploads | The case's memos, expenses and uploads. |
| Report | Case reports; see Report Builder. |
| Audit | The case audit log; see Audit Logs. |
While the case status is a Pending Review type, a CASE IS PENDING REVIEW - NO MODIFICATIONS ALLOWED banner shows. Nobody can edit the case then; only Admins can change its status.
Tabs
- Case Overview: evidence, case information and the right sidebar, described below.
- Uploads Gallery: Case Uploads with New Upload, then each evidence item's uploads, which load as you scroll. To show uploads in a list, see Image Gallery.
- USSS Stats: only when USSS Stats is on; see USSS Stats.
Evidence
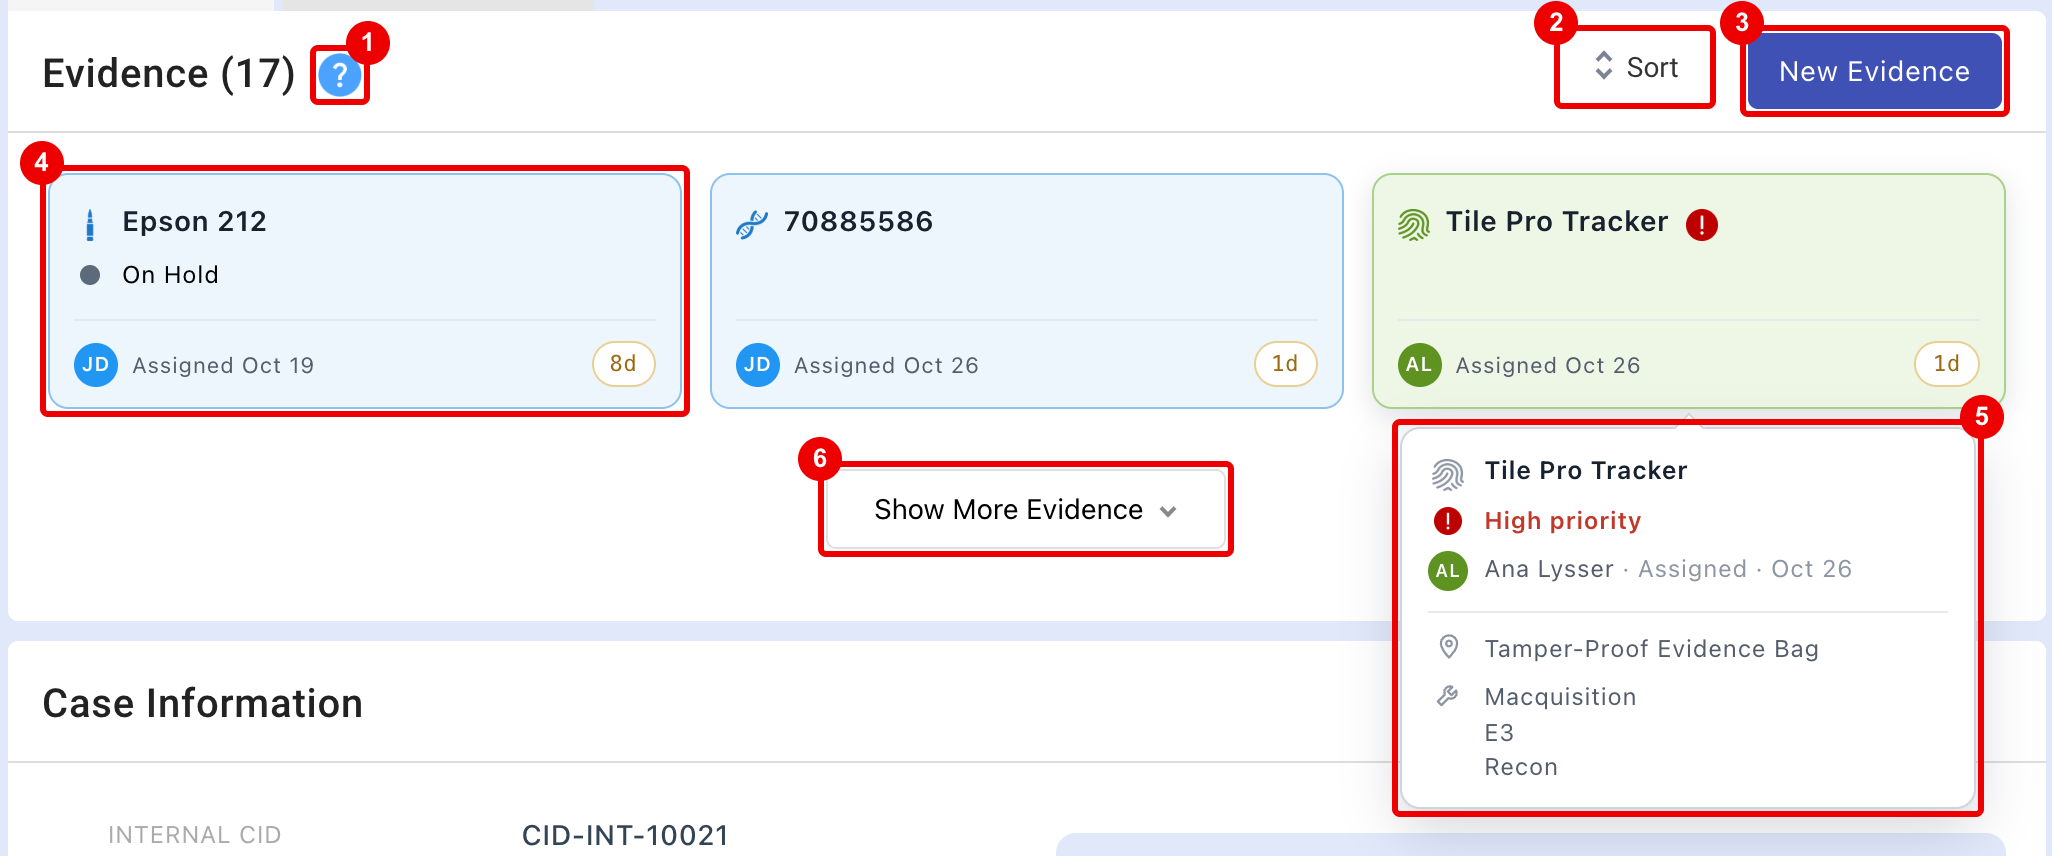
- The legend for card colours and badges (below).
- Sort: Evidence Assignment Color, Alphabetical, or by Evidence Status. The order is saved on the case for everyone, so only Admins can change it.
- New Evidence.
- An evidence card: type icon, name, Evidence Status, the assignee's initials, the date assigned and the days since. The days badge shows a check mark once the item is completed. Click the card to open the item.
- Hover over a card for its priority, assignee, location and the forensic tools used.
- Show More Evidence shows the rest of the cards; Hide Evidence folds them again.
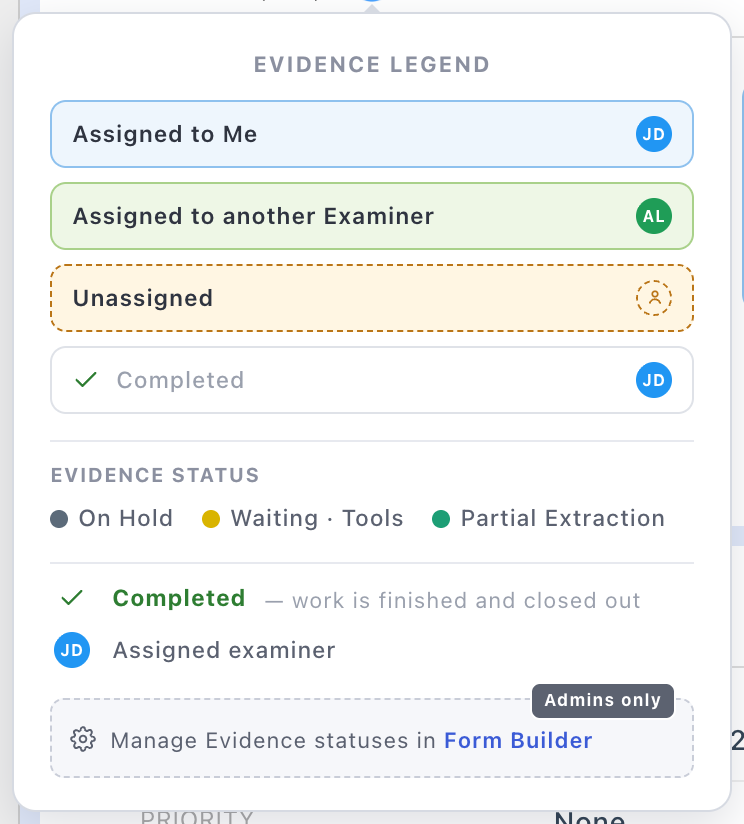
Card colours:
| Colour | Meaning |
|---|---|
| Blue | Assigned to Me |
| Green | Assigned to another Examiner |
| Orange, dashed | Unassigned |
| White, with a check | Completed |
The Evidence Status values and colours come from the Form Builder; see Evidence Status and badges.
Case Information
The case's fields, laid out by the Form Builder.
- Click Edit to change them; fields save as you edit.
- Click View to go back. Required fields must be filled first.
Right sidebar
Click a heading to open or close its section.
- Case Permissions & Assignments: the primary assignment, Choose for who can see the case, and Edit for Permissions.
See Managing Read-only Users.
- In Permissions, Admins also see Read Only. A read-only case can't be changed by anyone, Admins included.
- Global Search Options shows when that setting is on; see Search.
- Memos with New Memo (see Memos), and Expenses with New Expense (see Expenses).
- Request Submissions: only on cases created from a lab submission; see Request Submission Manager.
Delete a case
With Delete Case on in About / Settings, a Delete Case button shows at the top right of the tabs. Anyone who can edit the case sees it. xBit asks you to confirm, and deletion can't be undone.
Change the case status
Click Status in the case menu, or the status badge.
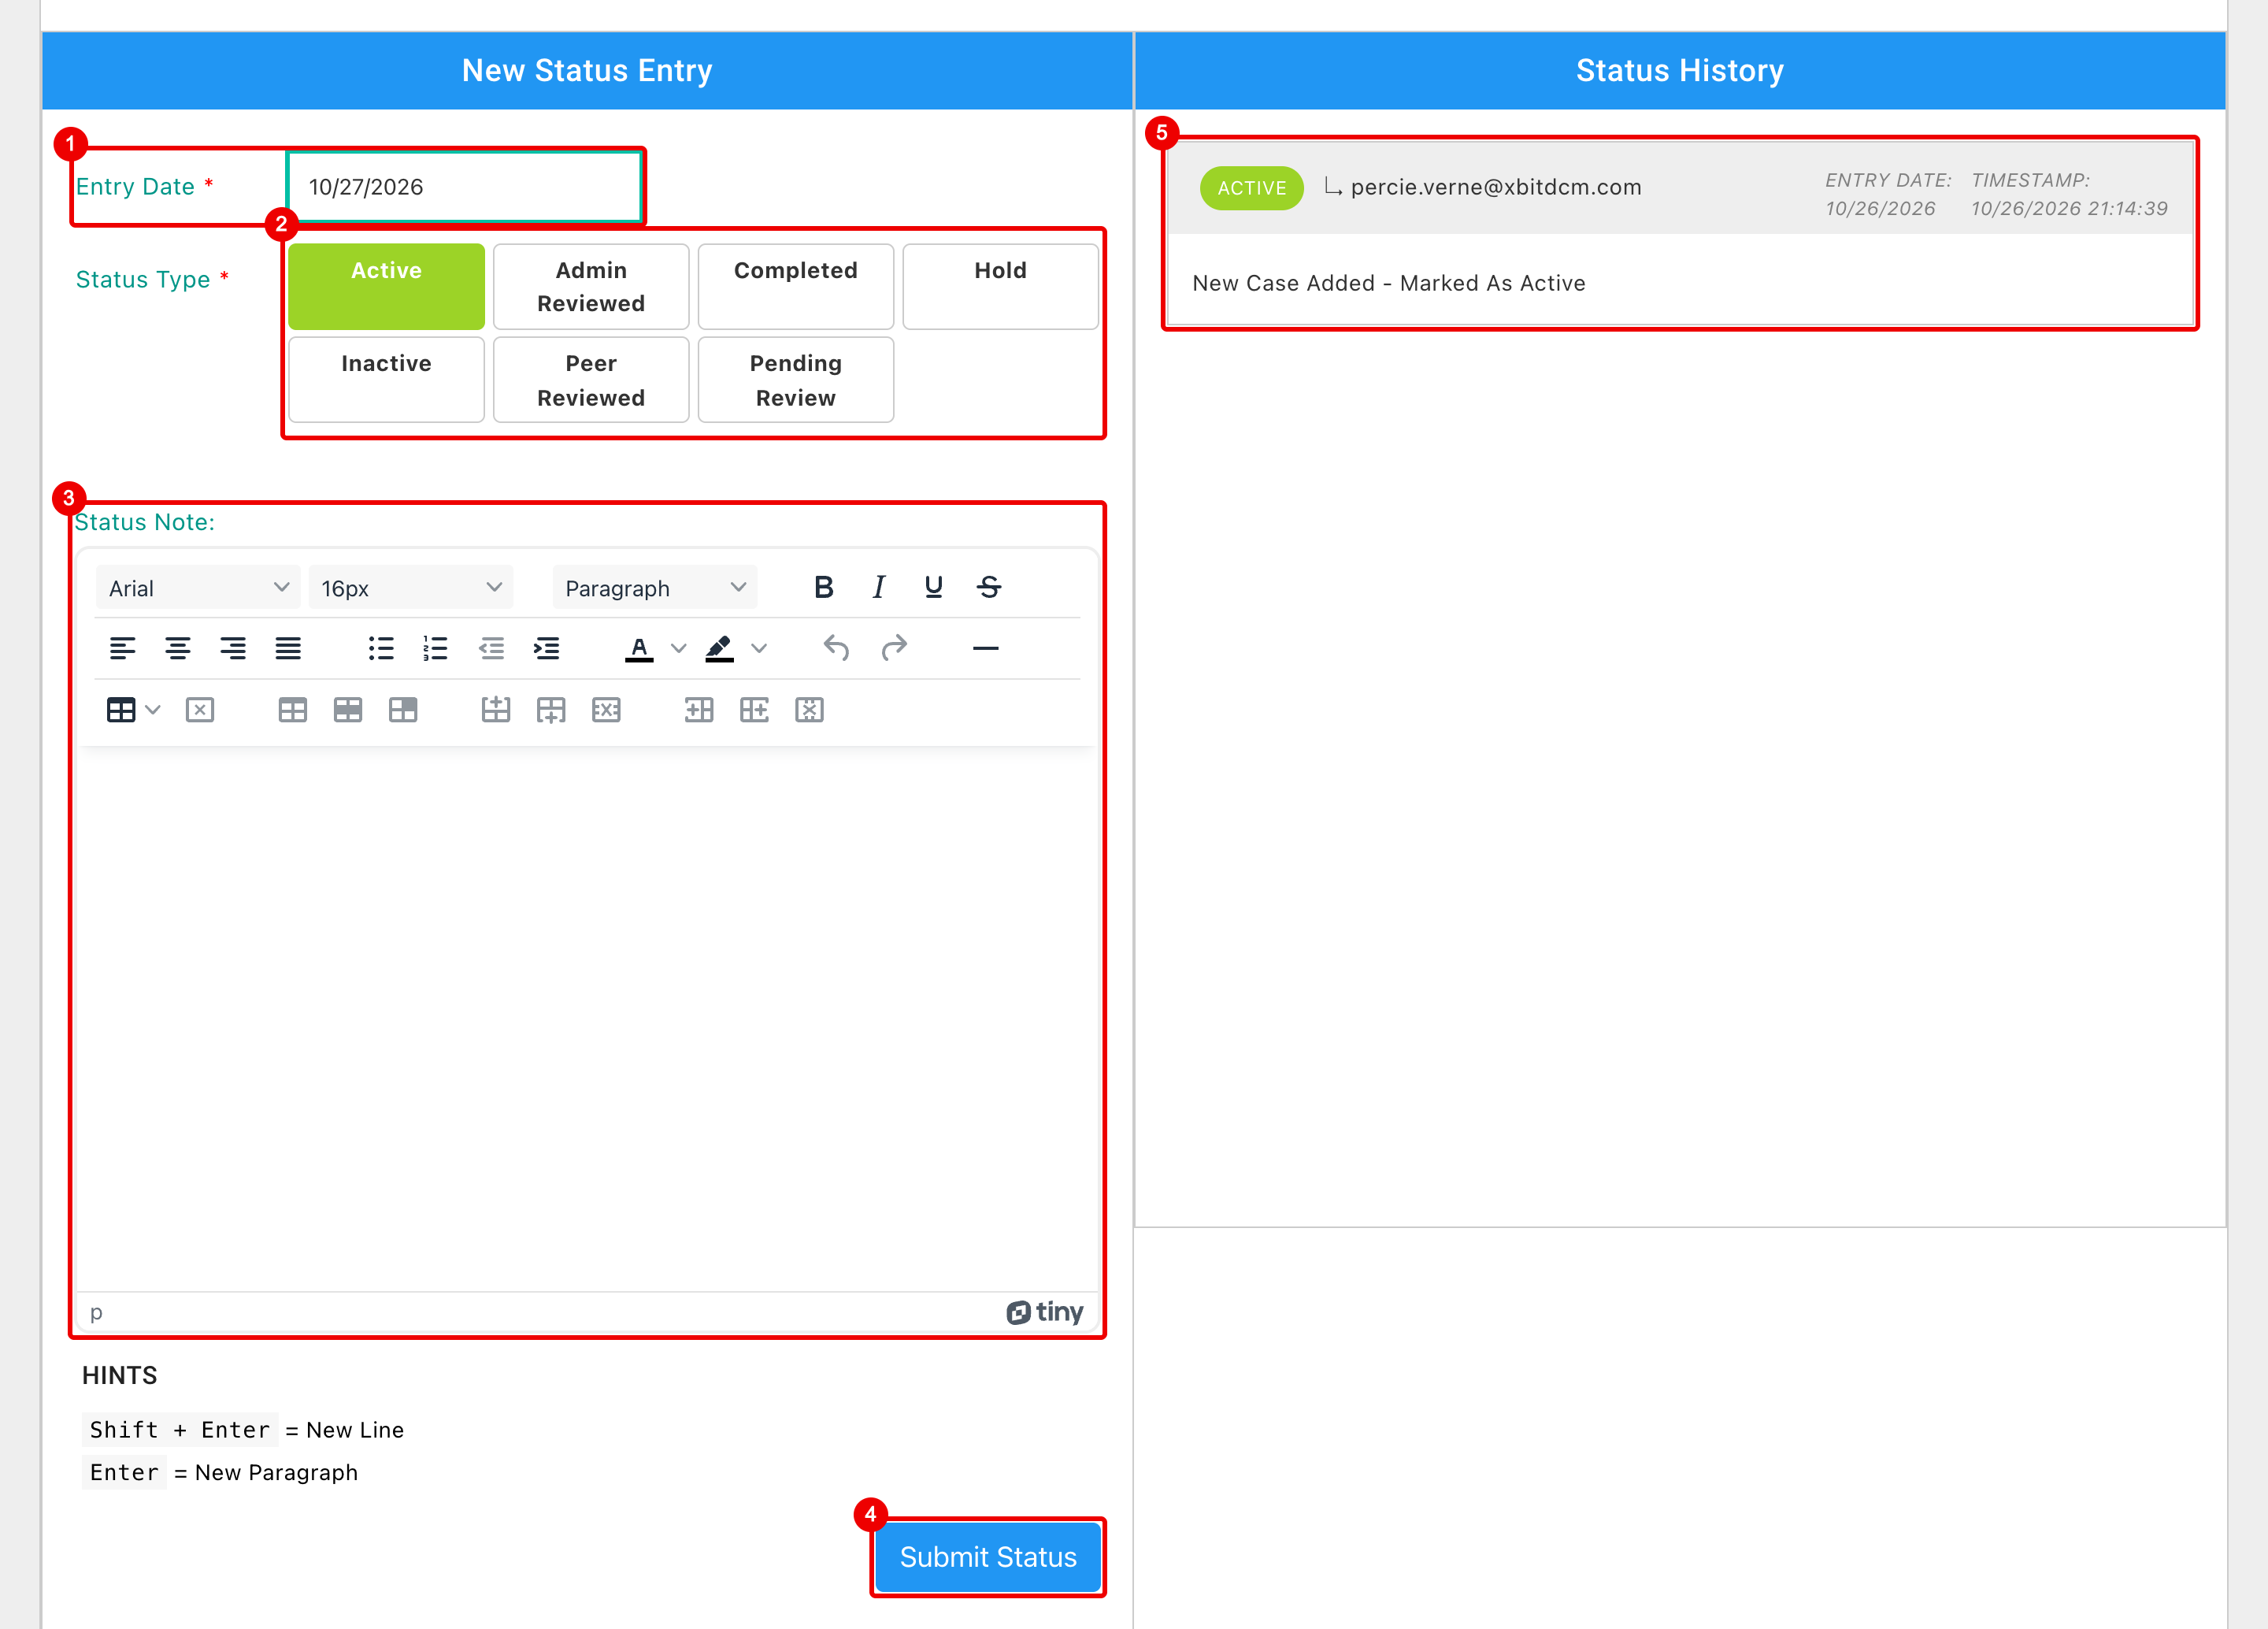
- Entry Date: today by default.
- Status Type: your lab's case statuses; see Case Status Types.
- Status Note: optional.
- Submit Status.
- Status History: every change, newest first; see Case Status History.
Anyone who can edit the case can change its status.
View Evidence
Left sidebar
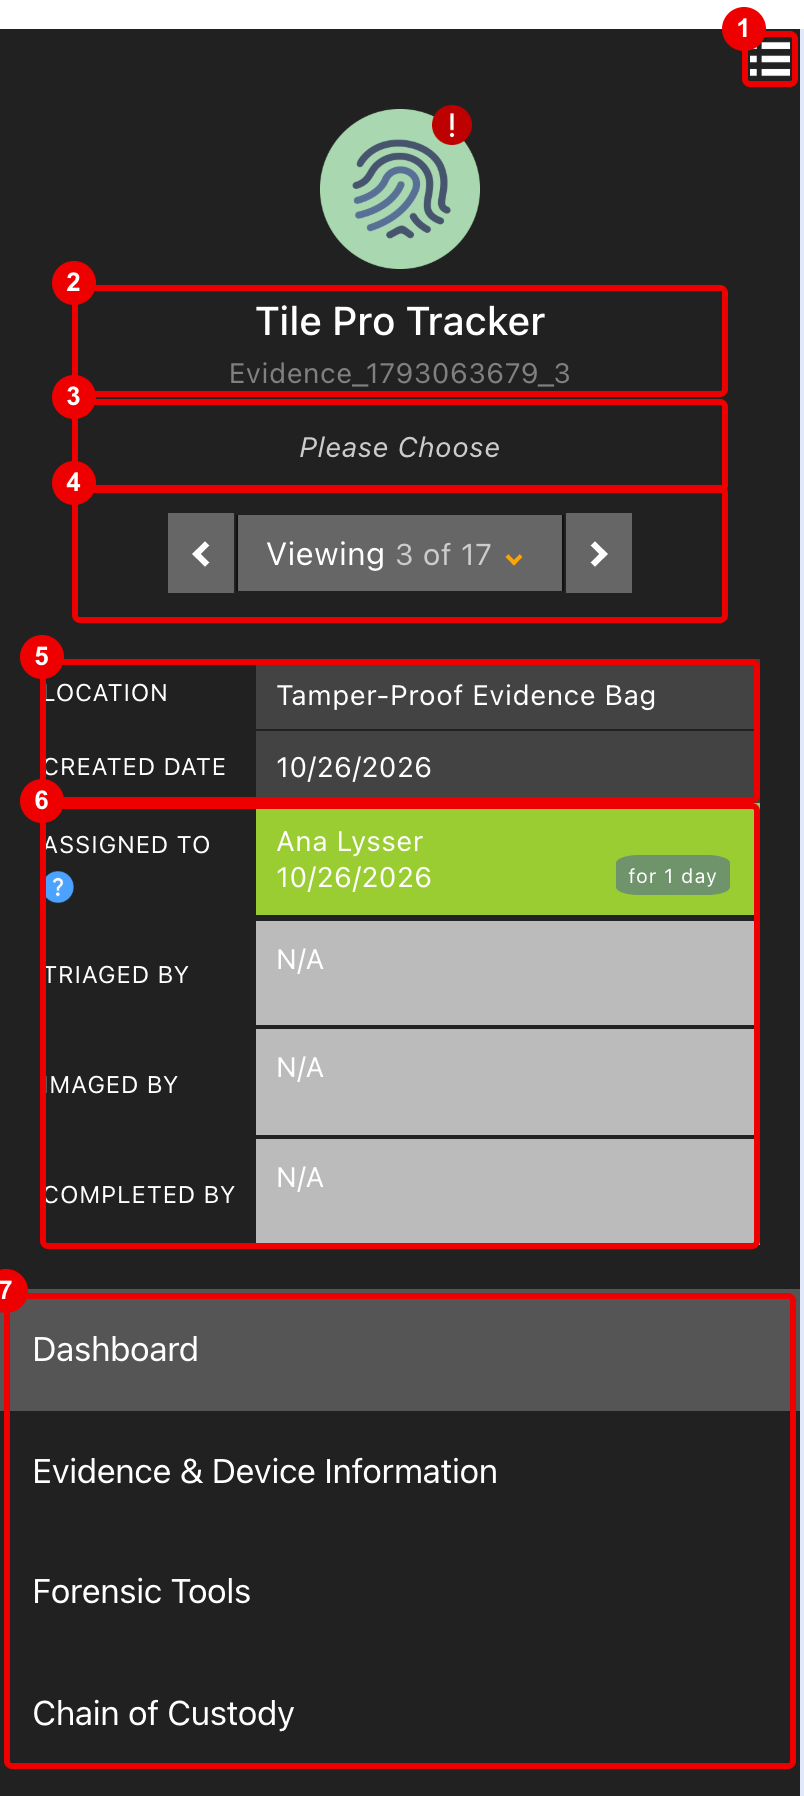
- Switch to Evidence List View: opens the case's evidence list.
- The evidence name and Evidence ID.
- Evidence Status: pick a value to change it.
- The evidence switcher (below).
- Location, from the latest Chain of Custody entry, and Created Date. Items from a lab submission also show Requested On.
- Assigned To, Triaged By, Imaged By and Completed By, each with its date. Click one to change it (below).
- The tabs (see Tabs).
A red ! on the icon marks high-priority evidence.
Switch between items
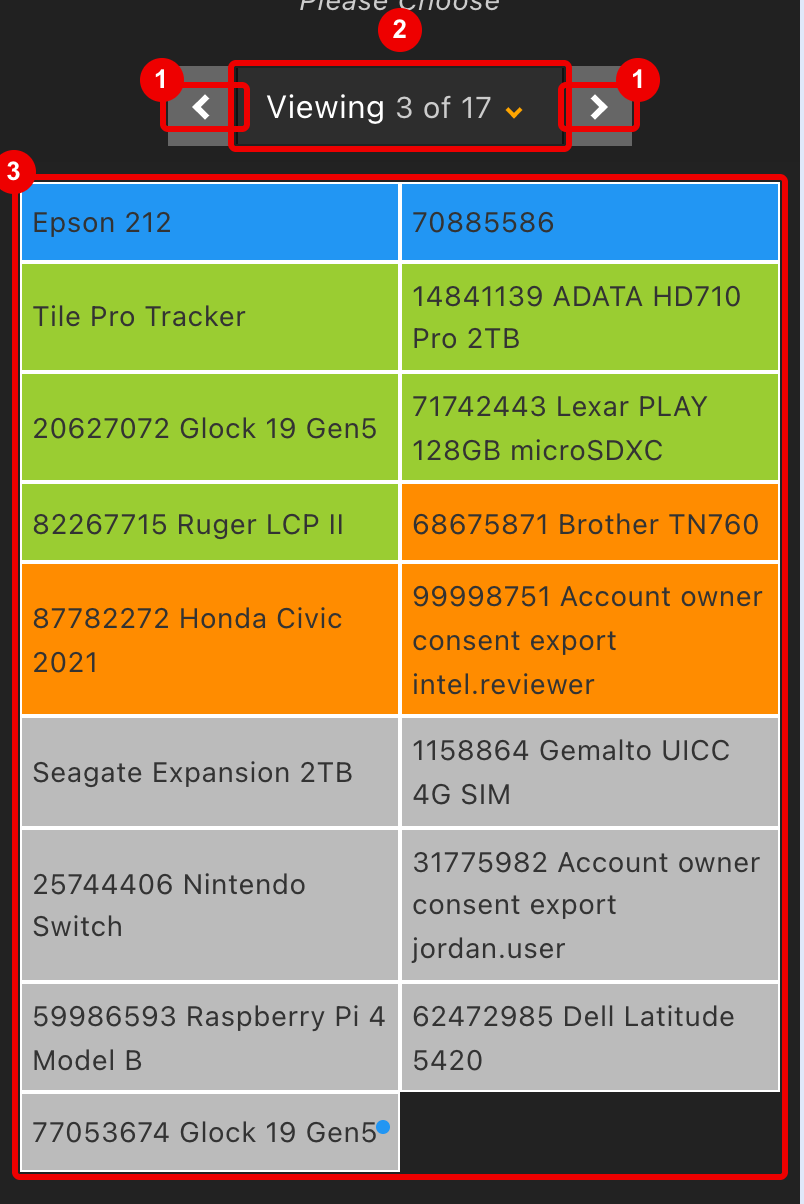
- Previous and next item in the case.
- Viewing 3 of 17: click to list every item.
- Click an item to open it. The colours match the case cards: blue is yours, green someone else's, orange unassigned, grey completed. A blue dot marks items you completed; a red dot marks items from a lab submission.
Assign, triage, image and complete
Click Assigned To, Triaged By, Imaged By or Completed By.
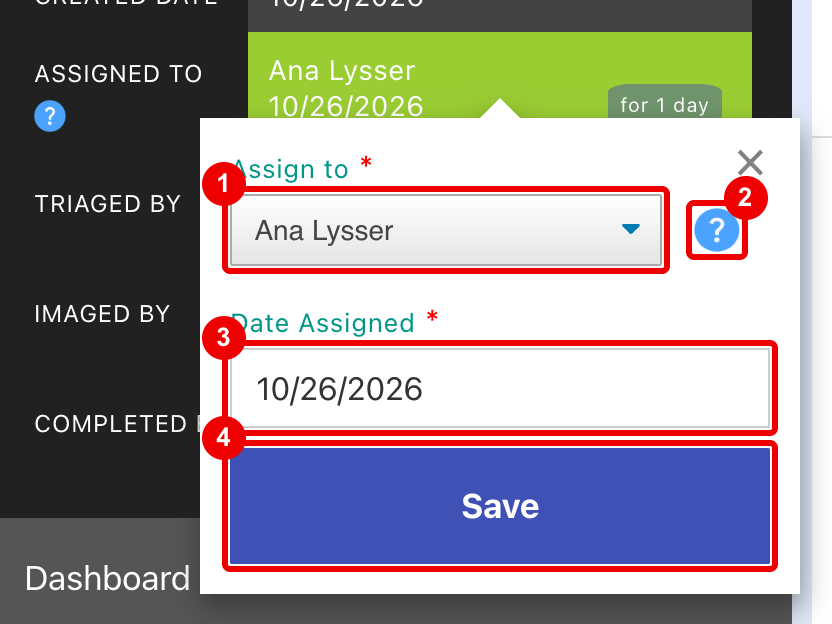
- Pick a user, or UNASSIGN. Triaged By also takes Other, a name you type.
- Can't find a user? Make sure they have access to the case.
- The date.
- Save.
Only users who can edit the case can change these.
Lock or delete evidence
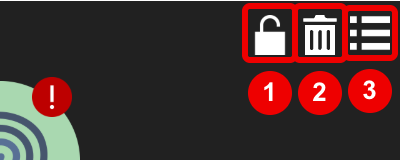
- Lock Evidence: shown when Lock Evidence is on in About / Settings. A locked item can't be changed until someone who can edit the case clicks the lock again.
- Delete Evidence: shown when Delete Evidence is on in About / Settings. xBit asks you to confirm, and deletion can't be undone.
- Switch to Evidence List View.
Evidence tabs
| Tab | Shows |
|---|---|
| Dashboard | Uploads, memos and expenses for the item (below). |
| Evidence & Device Information | The item's fields (below). |
| Forensic Tools | The tools used on the item (below). |
| Chain of Custody | Custody entries, when Chain of Custody is on; see The Chain of Custody tab. |
| External Request | The lab submission the item came from; see Request Submission Manager. |
| Review Timeline | Reviews, when reviews are on; see Review Timeline. |
With reviews on, the review controls also show on the right; see Review an evidence item.
Dashboard tab
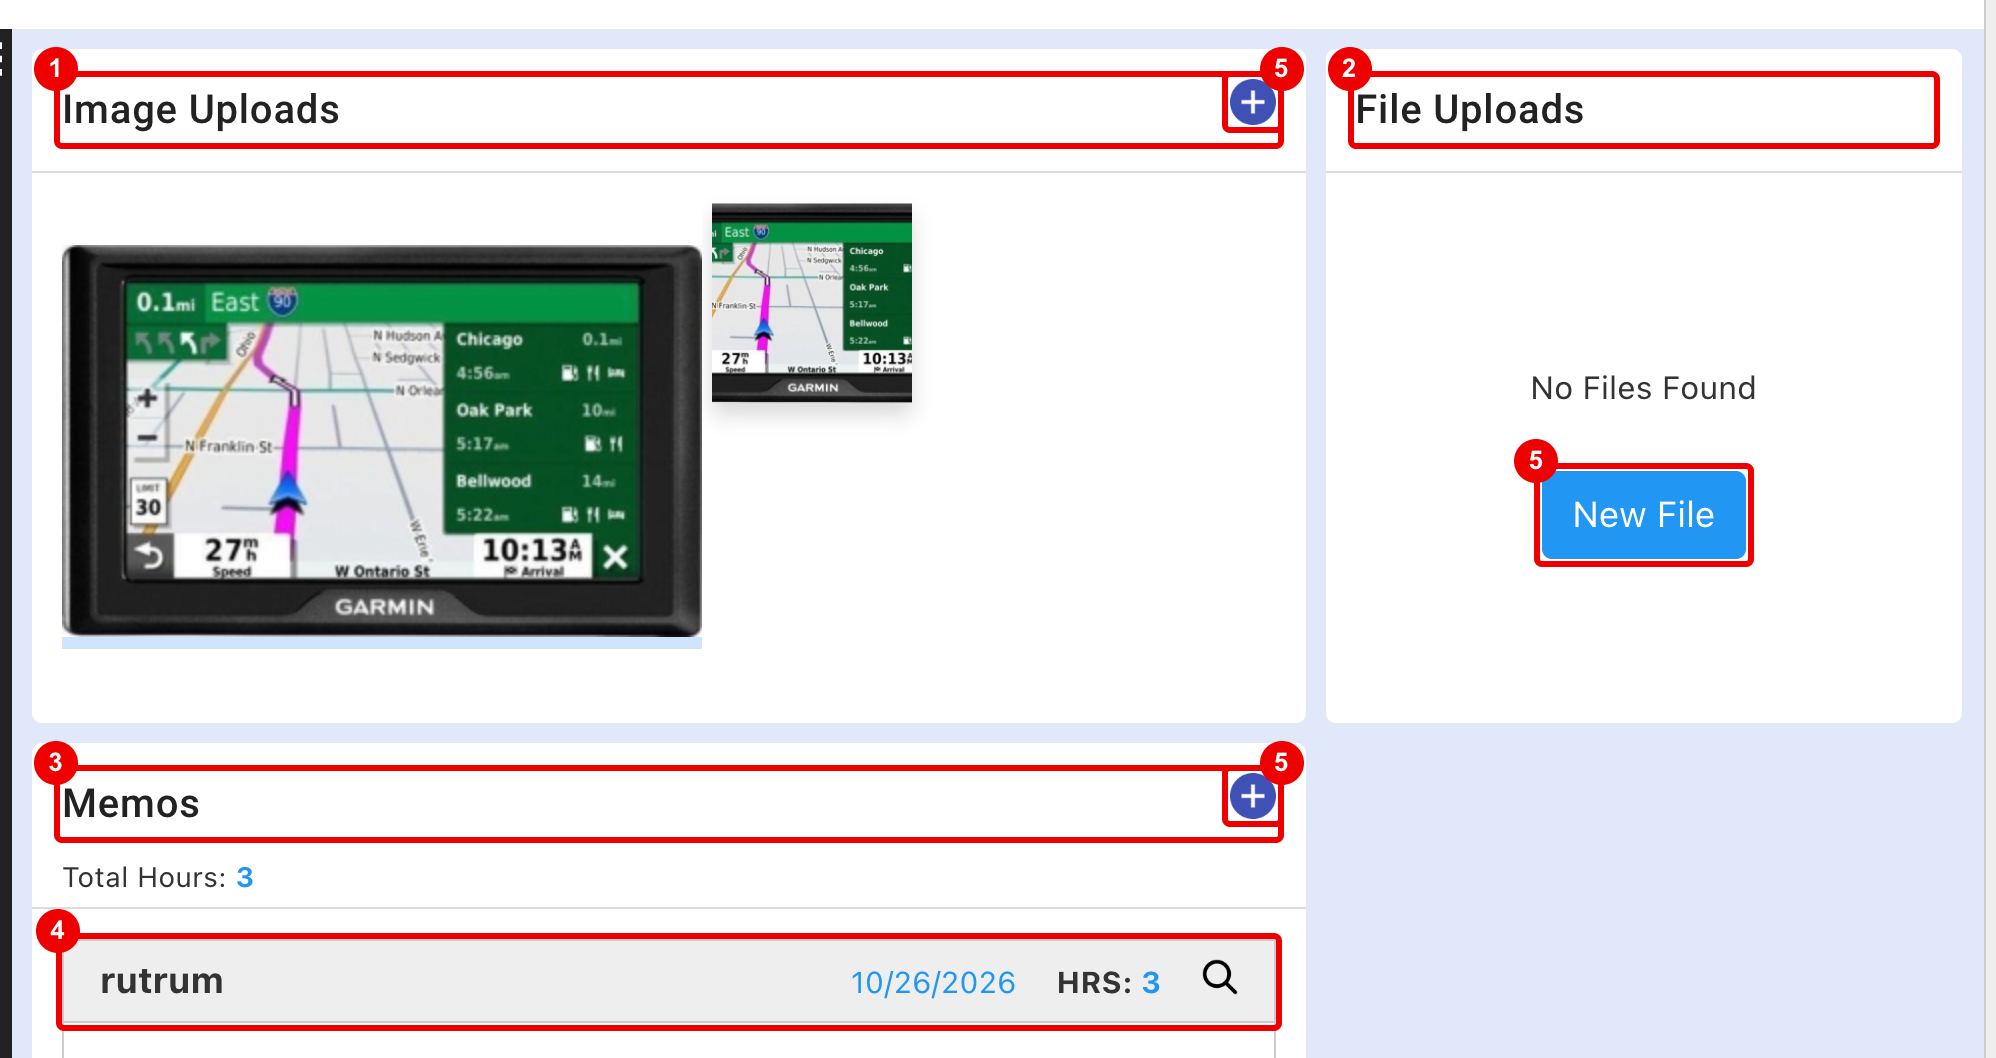
- Image Uploads: images uploaded to the item.
- File Uploads: other files.
- Memos and their Total Hours.
- A memo; click the magnifier to open it.
- + and New File add an upload or memo.
Expenses for the item follow below the memos. When the item's Make and Model match a Device Lookup device, an APEx Entry Found panel shows too; see Devices.
Evidence & Device Information tab
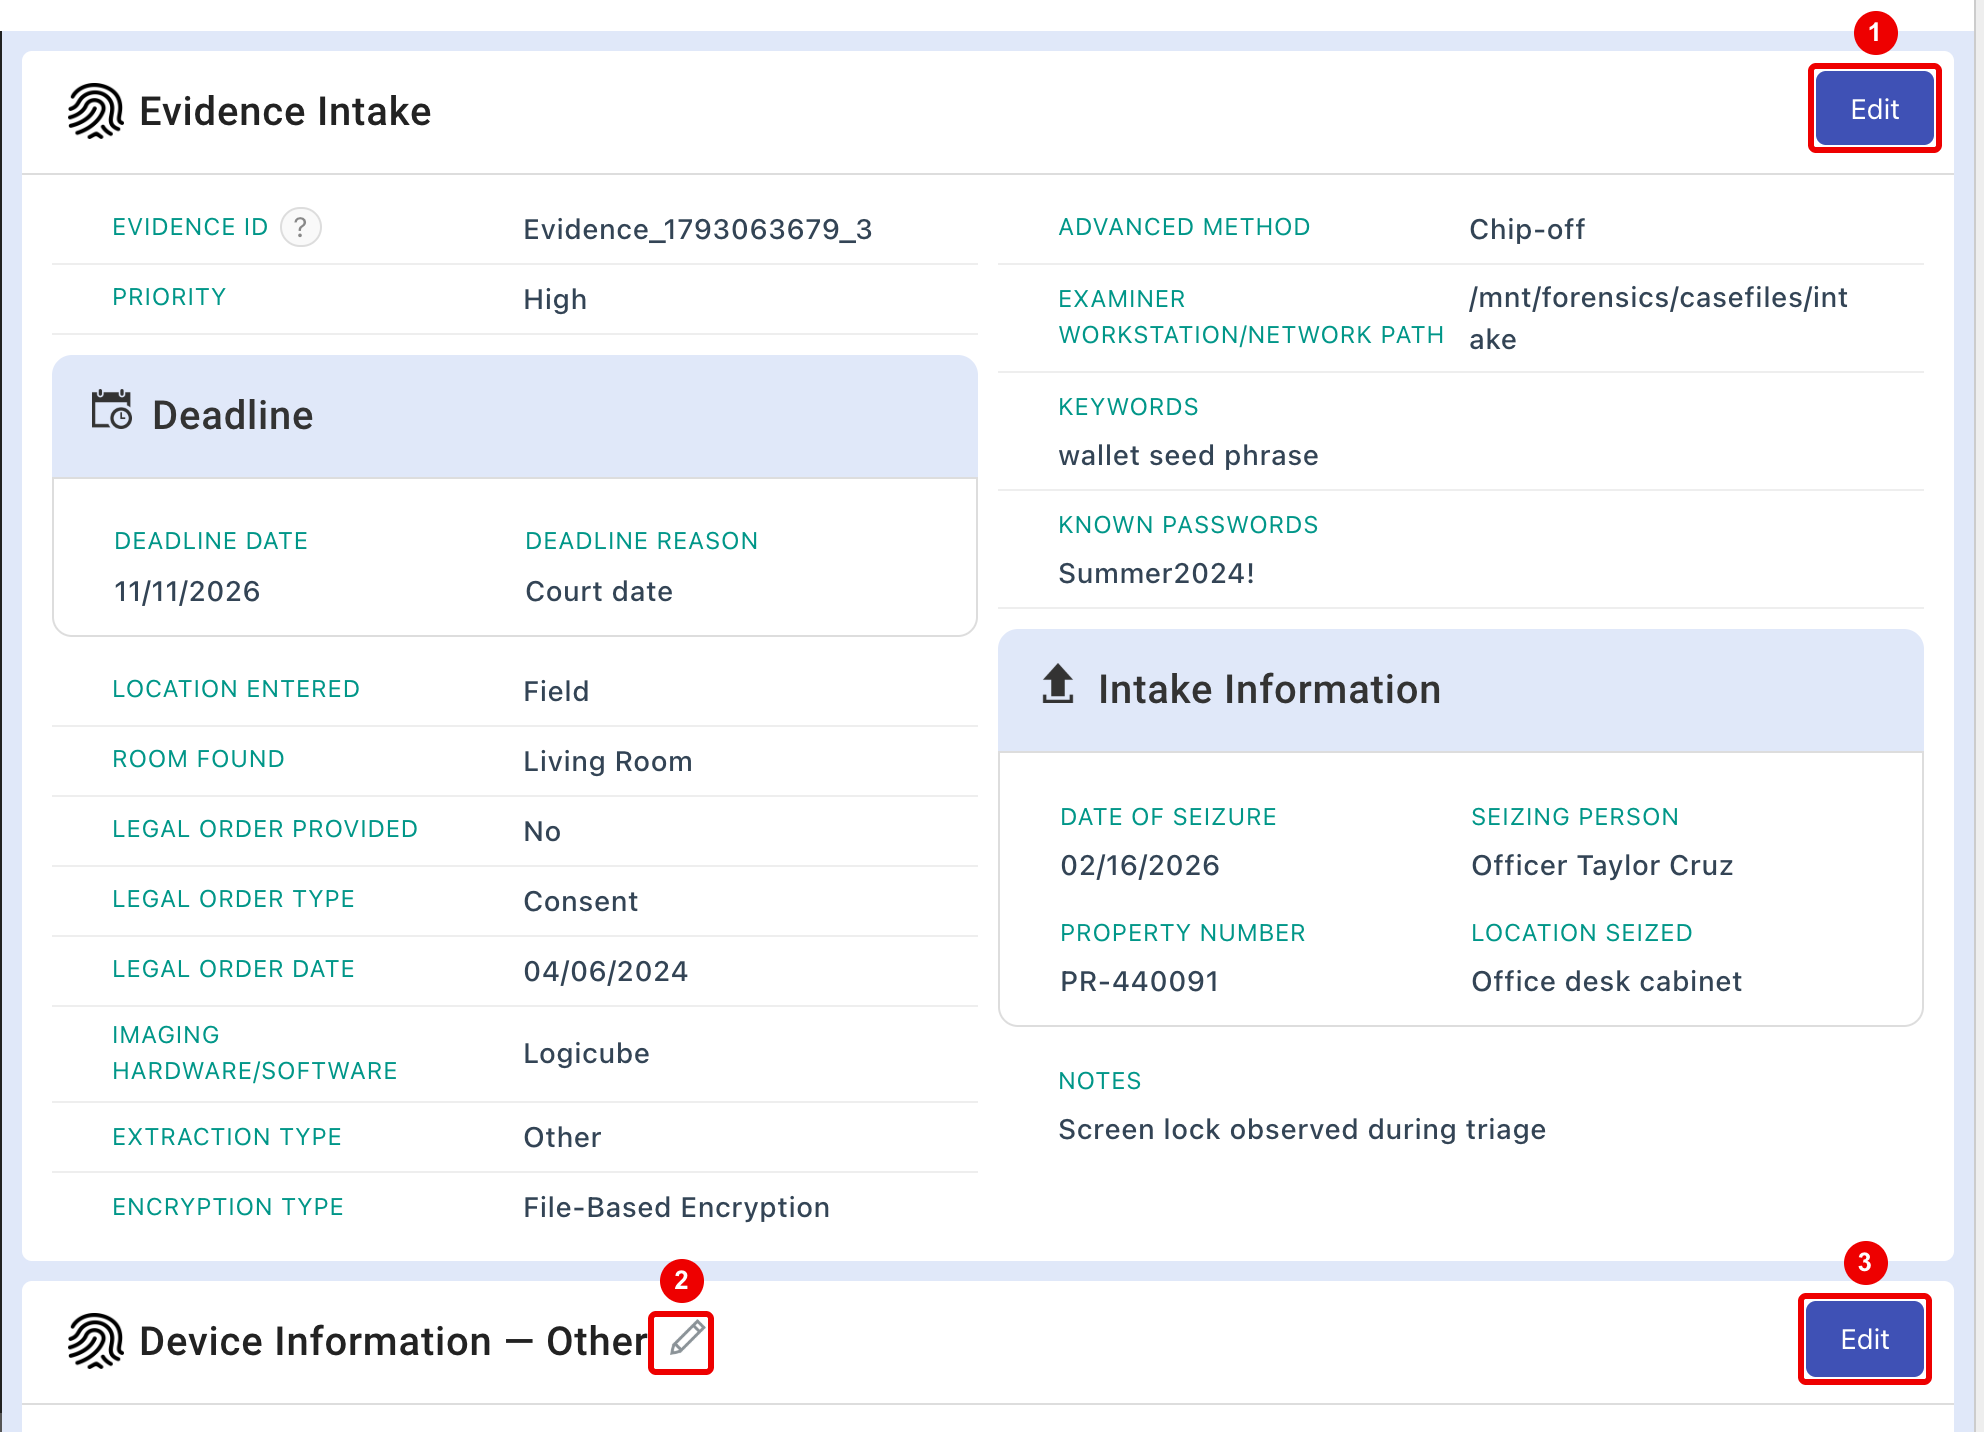
- Edit the intake fields; View goes back.
- Change Evidence Type: moves the item to another evidence type, mapping its fields step by step.
- Edit the device fields.
Both sections show the fields set in the Form Builder.
Forensic Tools tab
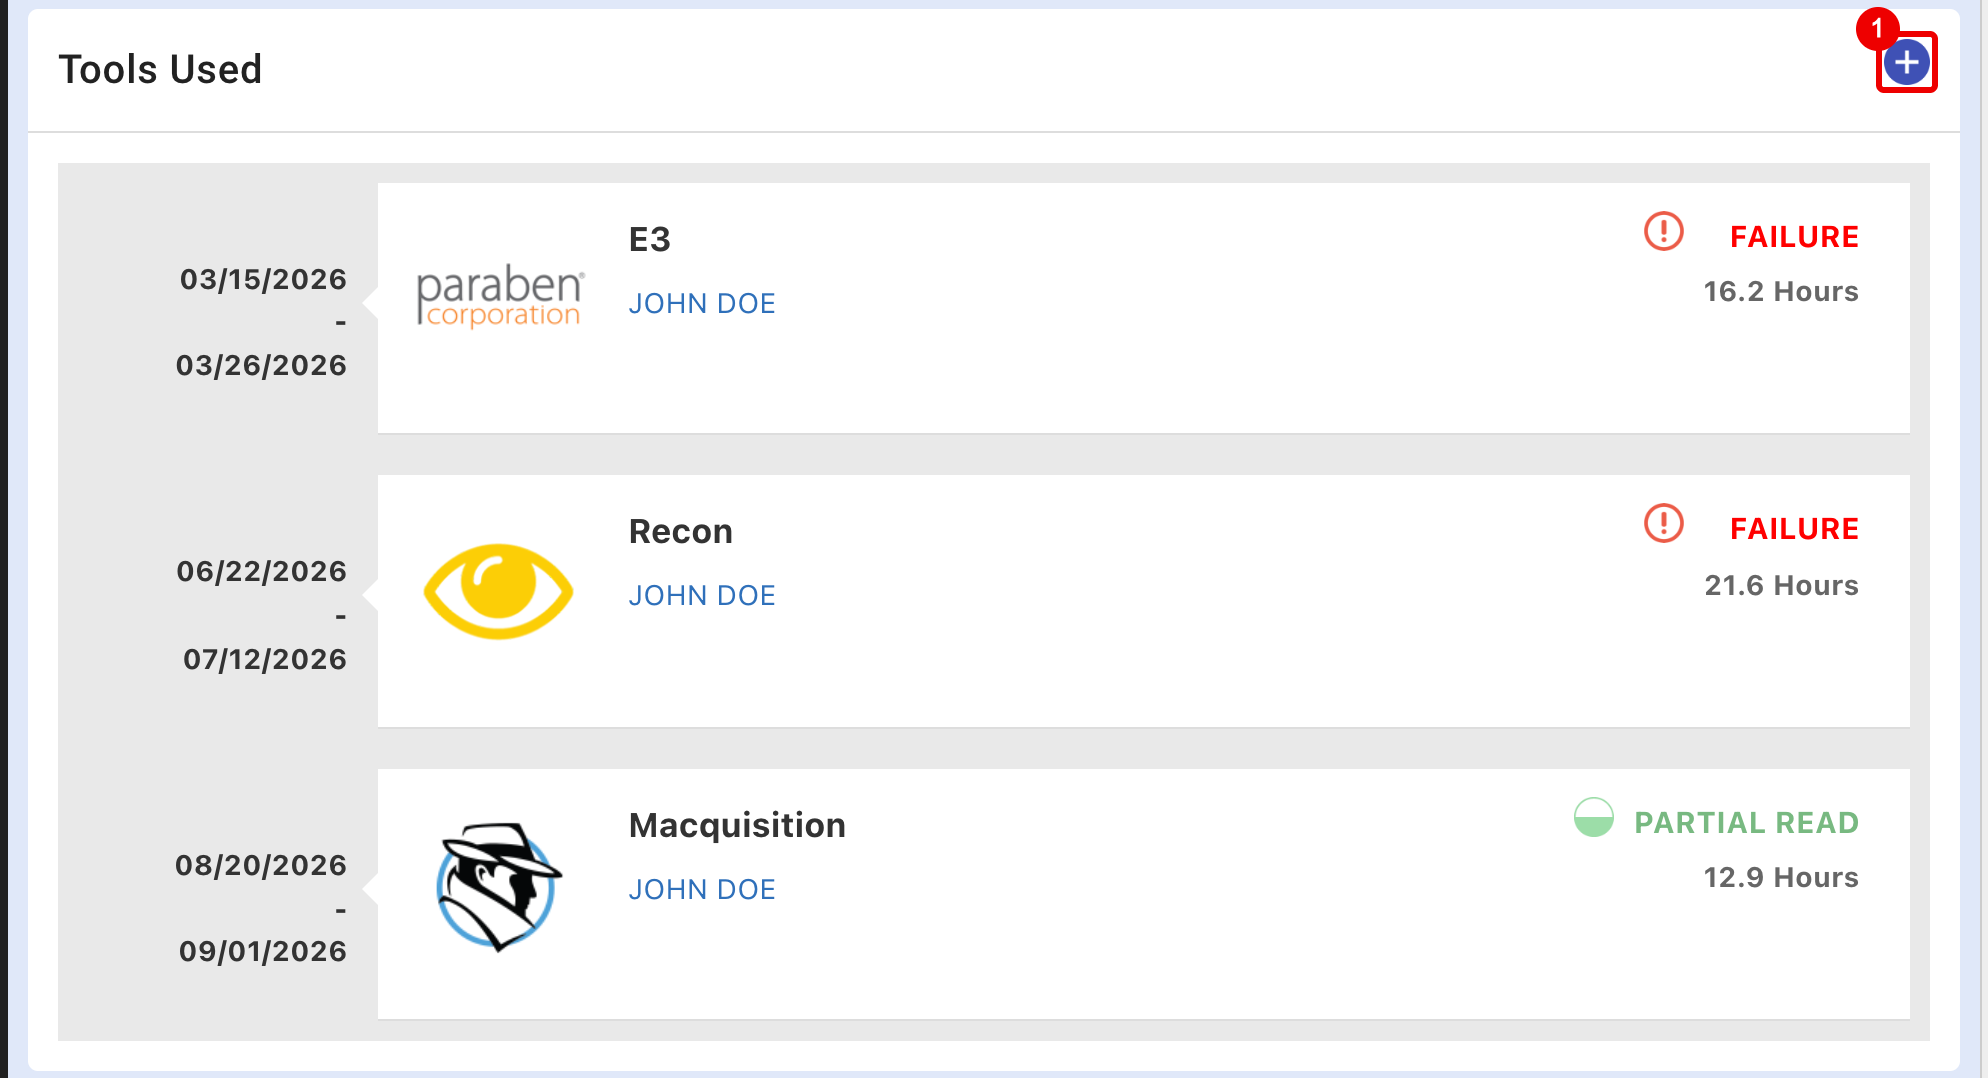
- + opens New Forensic Software Exam: Forensic Software, Version, Examiner, Start Date, Finish Date, Hours, Exam Results and Notes.
Click a tool to edit it or Remove it. The tools and results lists are in the List Manager.
Keyboard shortcuts
On a Mac, use Option for Alt.
| Keys | Action |
|---|---|
| Alt+N / Alt+P | Next or previous page in the case menu |
| G, then M | Focus the case menu |
| G, then E | Focus the evidence cards |
| G, then D | Focus Case Information, or the evidence tab content |
| G, then S | Focus the sidebar |
| Alt+D | Switch Case Information between Edit and View |
| Alt+A | New Evidence |
To find a menu entry by typing, see Type to filter.