Groups / Users
Go to Admin > Groups / Users. The page has two tabs: Users and Groups.
Users
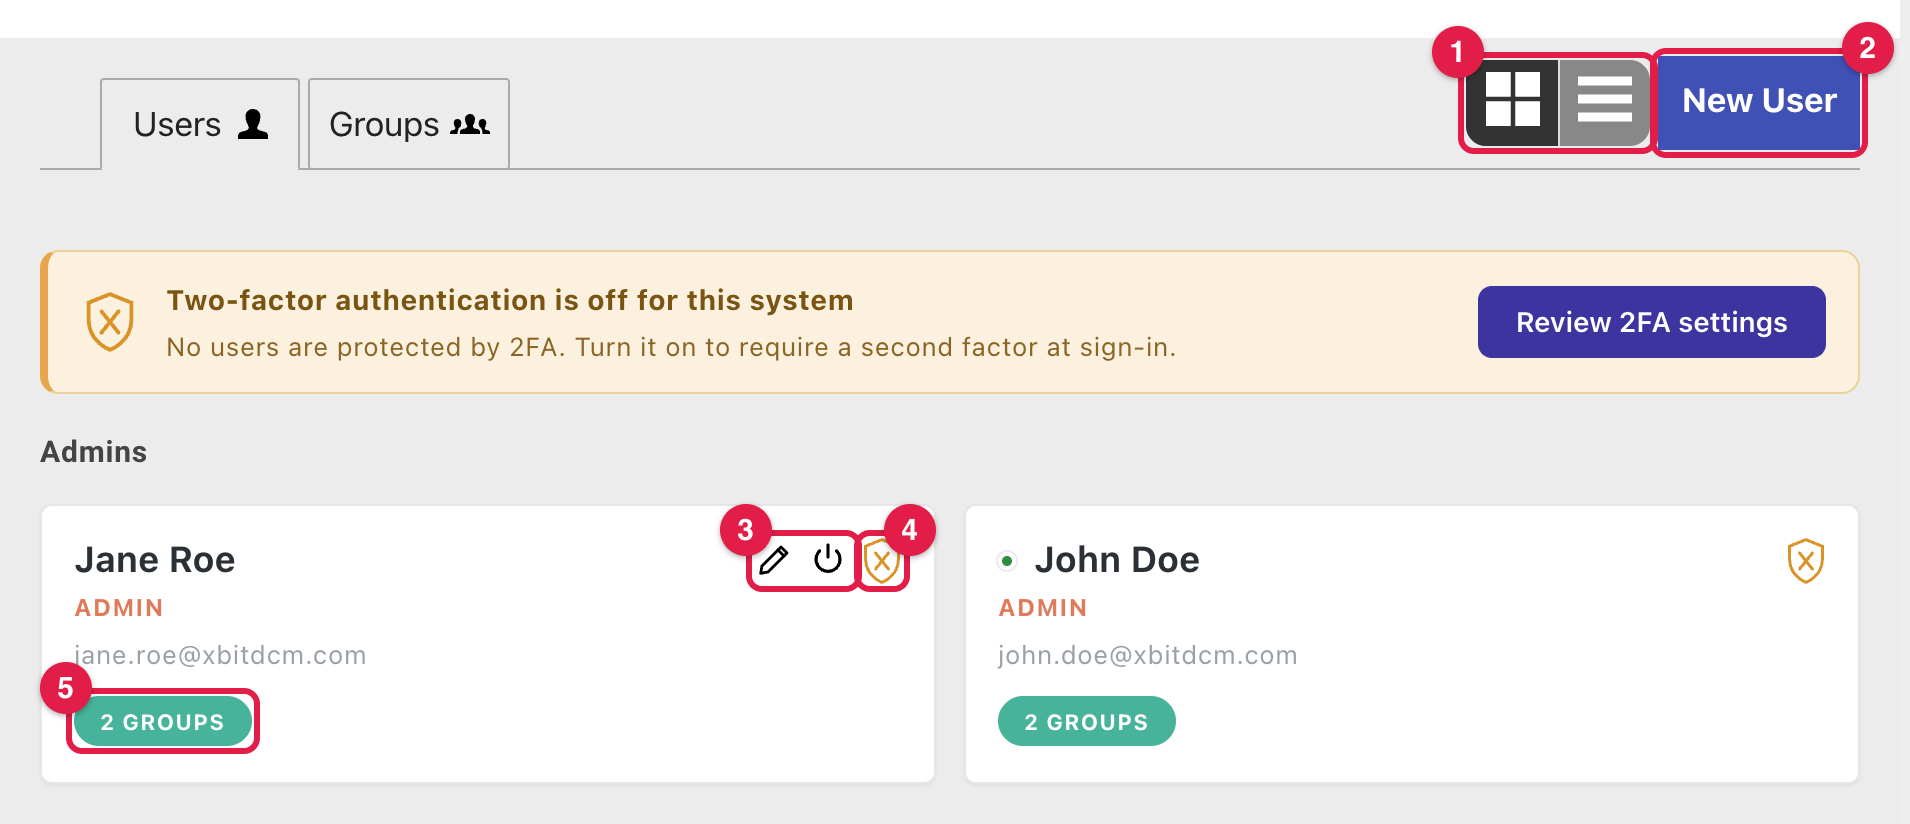
- Switch between Grid View and List View.
- New User: add a user.
- Edit or Disable User. Shown when you hover over a card.
- Two-factor authentication (2FA) status. Click to manage the user's authenticator app or recovery codes.
 App + Email: authenticator app, with email as backup.
 Email only: codes by email.
 Off: 2FA is turned off for the whole system.
 Off, but the user still has recovery codes.
- The groups the user belongs to.
Locked out and disabled users
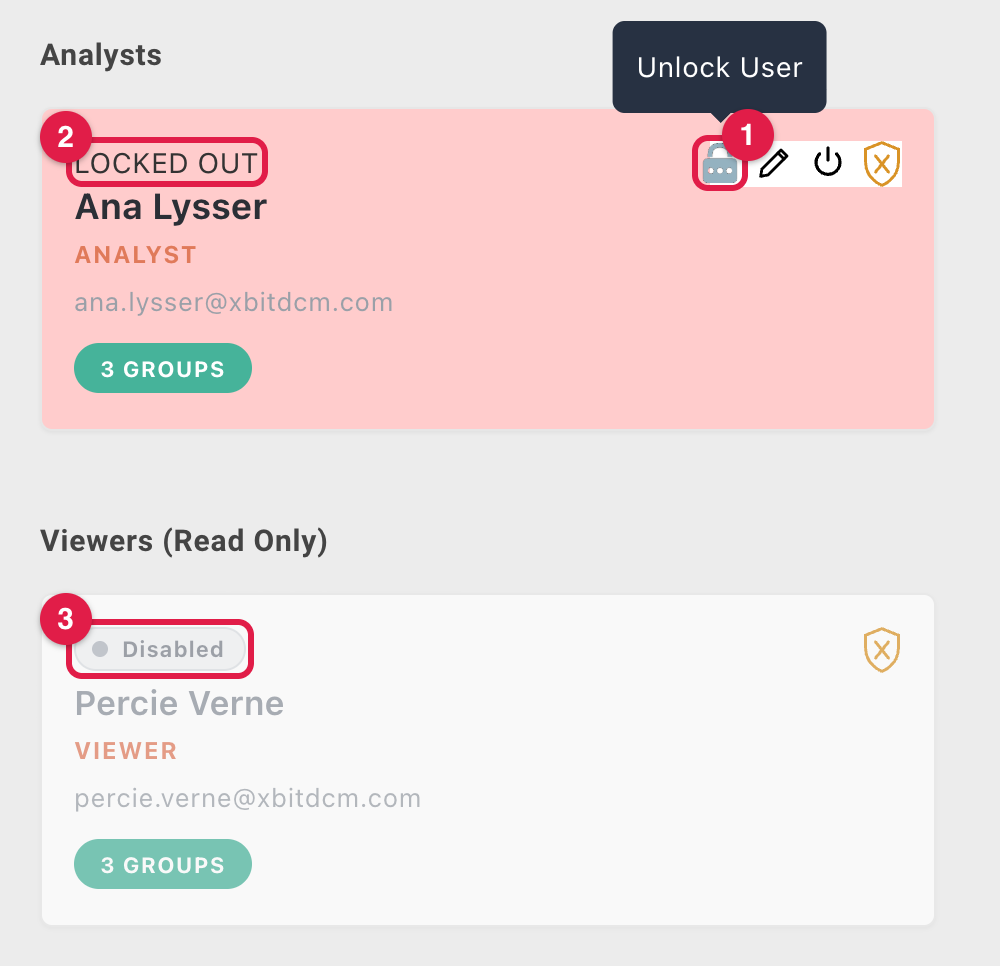
- Unlock User: lets a locked-out user sign in again.
- Locked Out: shown after 5 failed sign-ins. The card turns red.
- Disabled: the user can't sign in. Disabled cards are greyed out and listed last in their role.
Re-enable a user
A disabled user's card has no power button, only Edit.
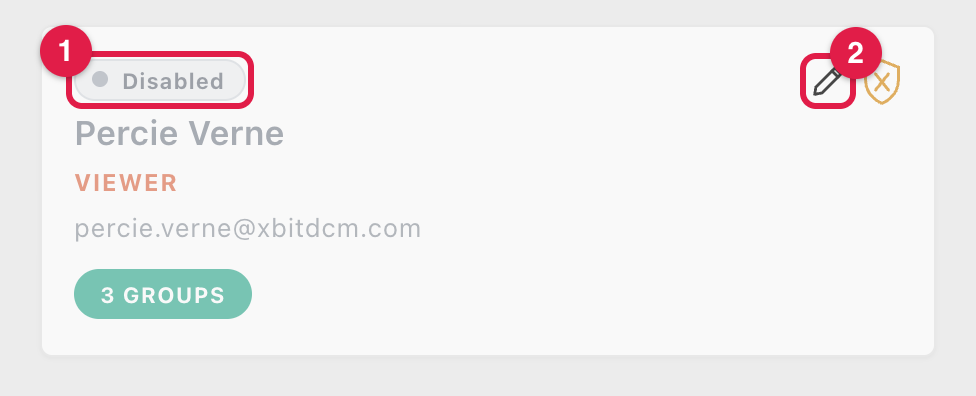
- Disabled badge.
- Edit: opens the user's details.
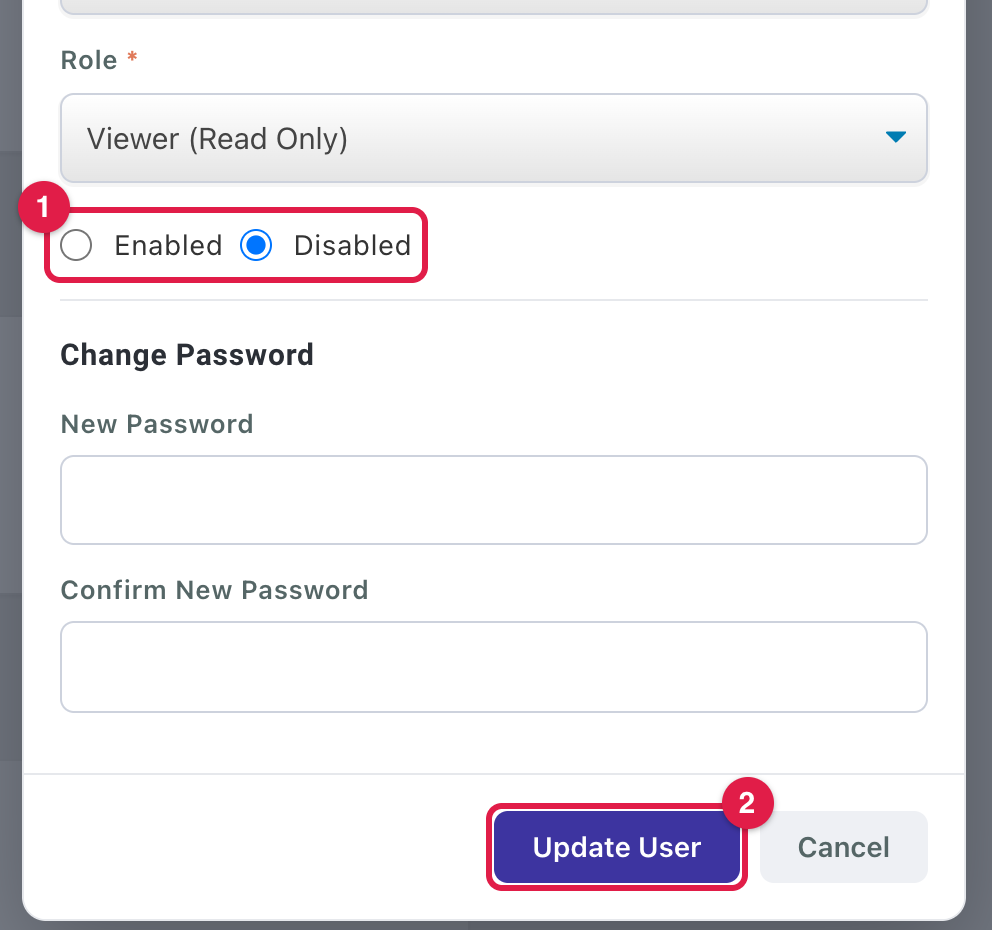
- Select Enabled.
- Click Update User.
List View
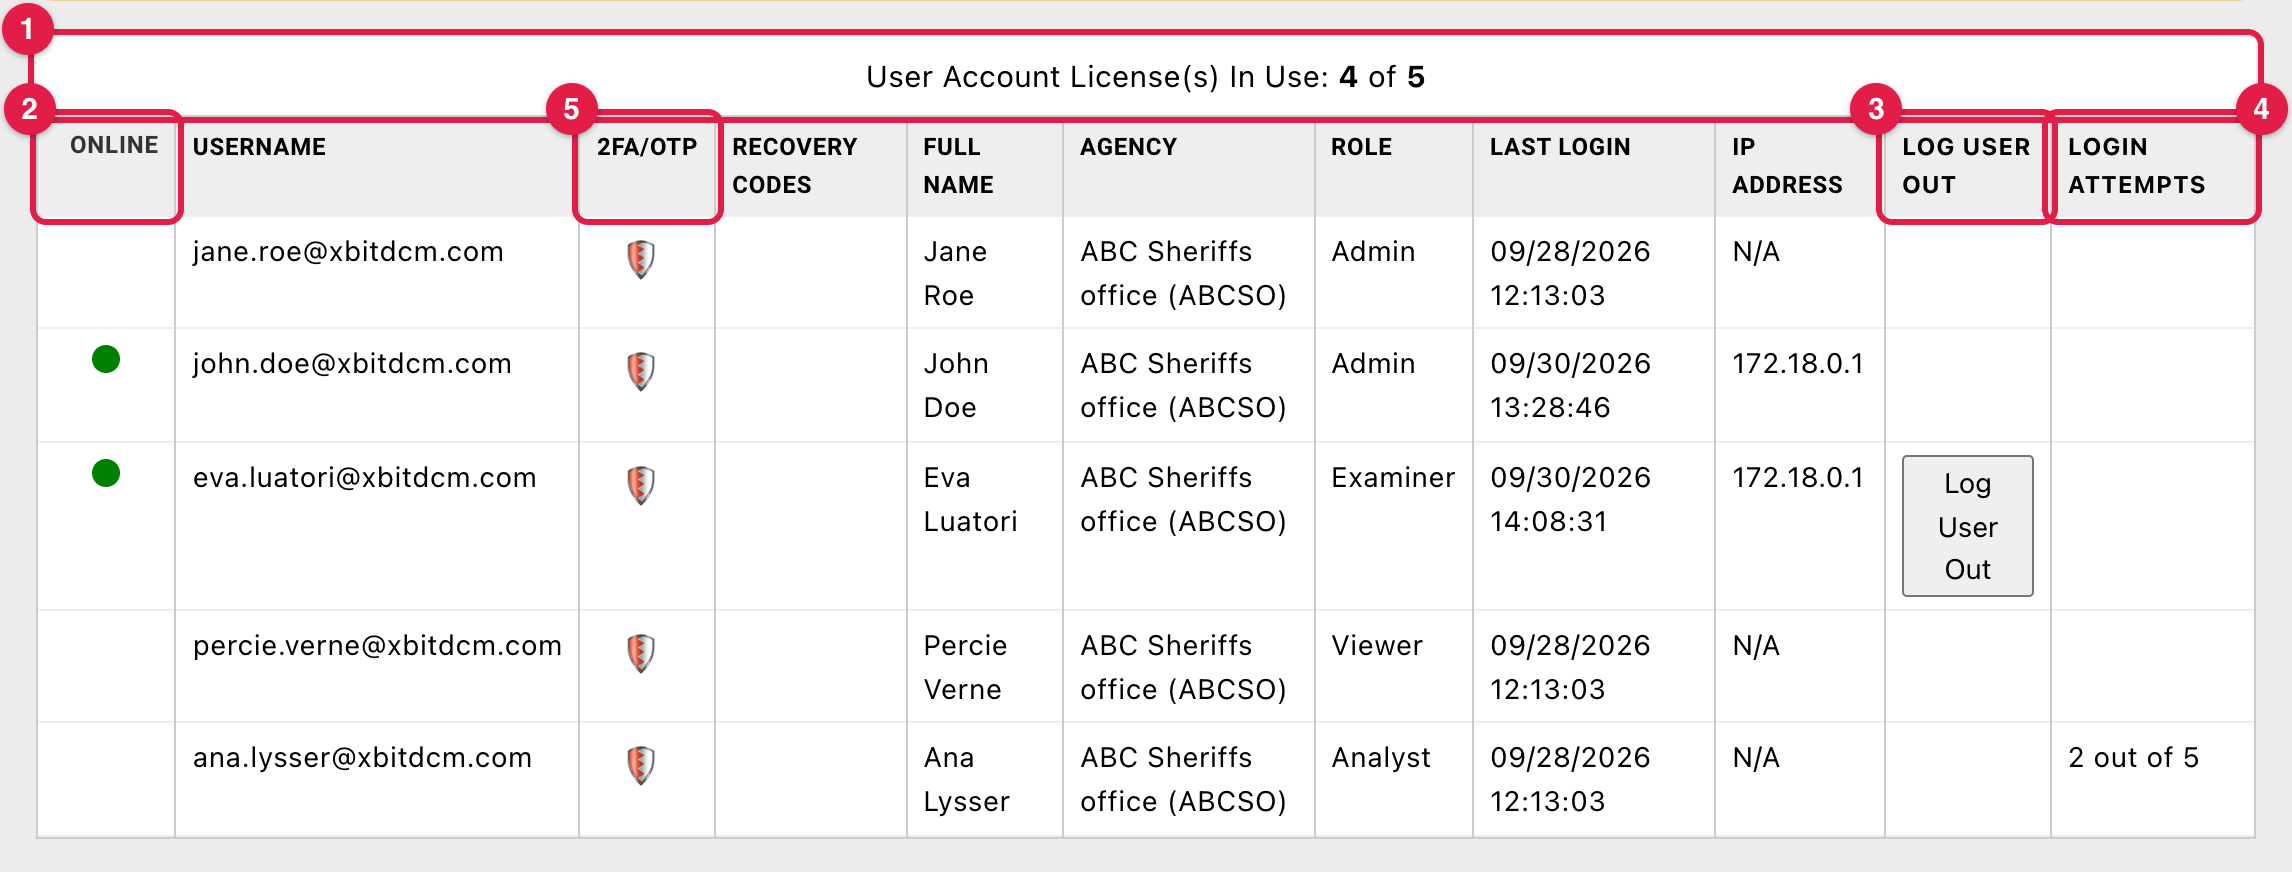
- Licenses in use. Enabled users count, except Viewers. When all licenses are used, you can only add Viewers. Contact Teel Tech for more.
- Online: active in the past 20 minutes.
- Log User Out: sign out an online user, and optionally disable them.
- Login Attempts: failed sign-ins, out of 5.
- 2FA/OTP: hover the shield for the user's 2FA status, or click it to manage. Grid View shows the status as separate icons (see ④ above).
Click a column heading to sort, or a row to edit that user.
Roles
- Admin: everything, including this page, lab-wide stats and admin features.
- Examiner: main case management user. No admin features; reduced lab-wide stats.
- Analyst: analysts, secretaries or anyone tracking cases or stats. Access can be limited per case.
- Viewer (Read Only): people who only review, such as ADAs or management. No license needed. Cases can be hidden from Viewers.
⚠️ Note: At least one Admin must stay enabled. You can't disable the last Admin or change their role.
Add a user
- Click New User.
- Enter First Name, Last Name, E-mail (also the username) and optional Phone.
- Choose an Agency and Role.
- Choose Password Setup ①.
- Choose a Status ②.
- Click Create User.
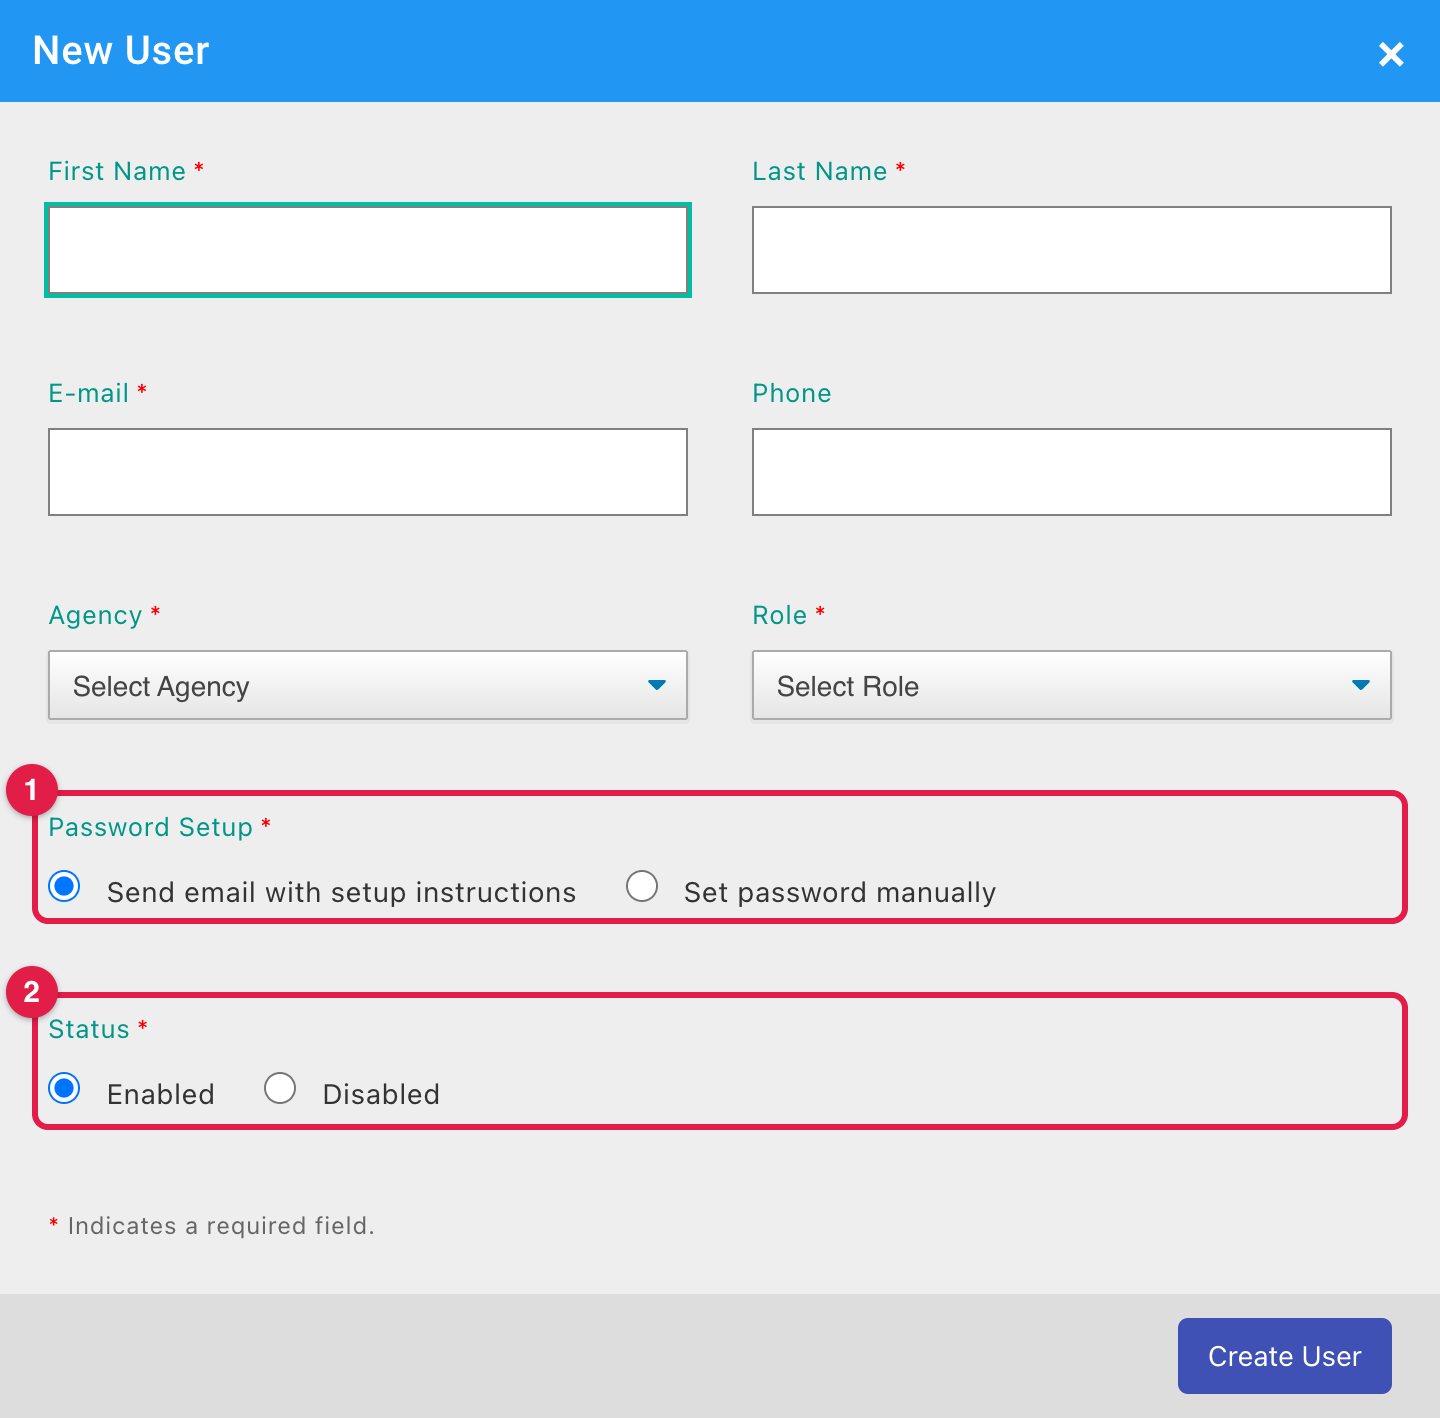
① Password Setup (only shown when email (SMTP) is set up):
- Send email with setup instructions: the user picks a password from a link that expires in 72 hours.
- Set password manually: you enter it.
② Disabled users get no email. Once enabled, they can use Forgot Password on the sign-in page.
Passwords: 8–35 characters, with a lowercase letter, an uppercase letter, a number and a symbol.
Edit a user
Click the edit icon on a card, or a row in List View.
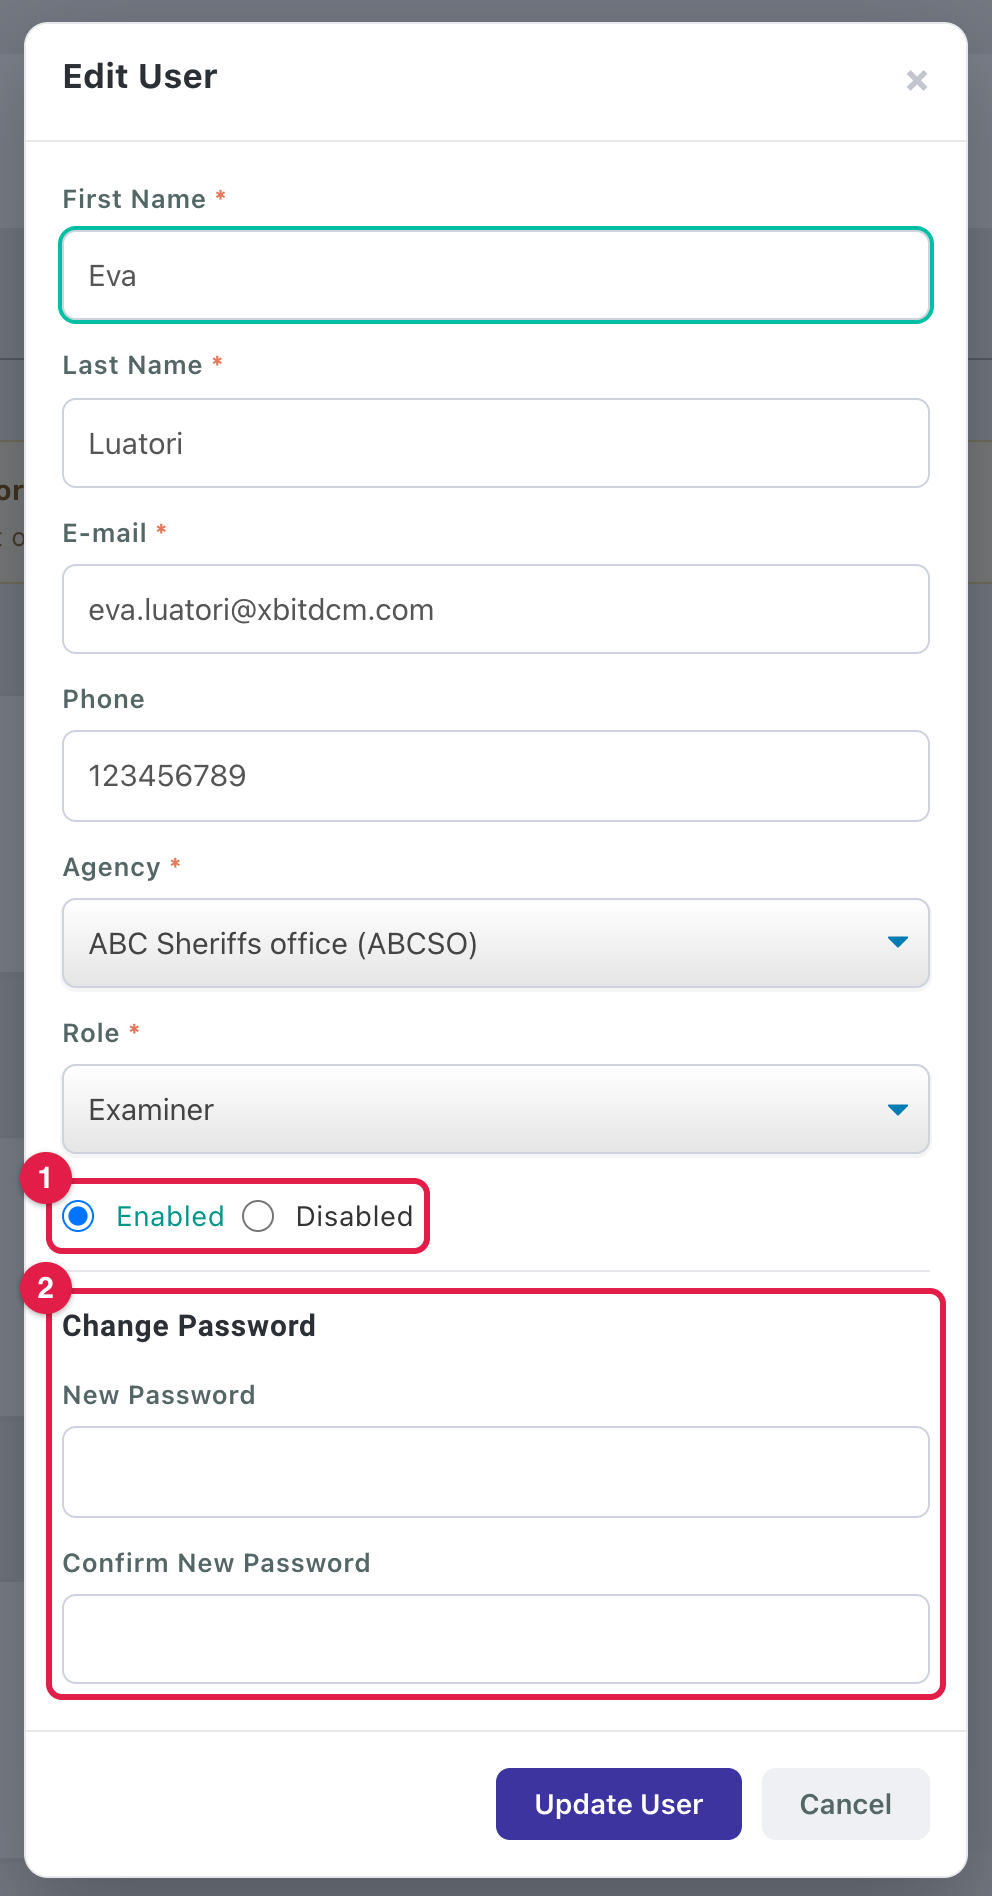
- Enable or disable the user.
- Setting a new password unlocks a locked-out user.
Click Update User to save.
ℹ️ Note: For directory users (Active Directory, LDAP, Microsoft Entra), name, email, role and password come from the directory. You can still change phone, agency and status.
Groups
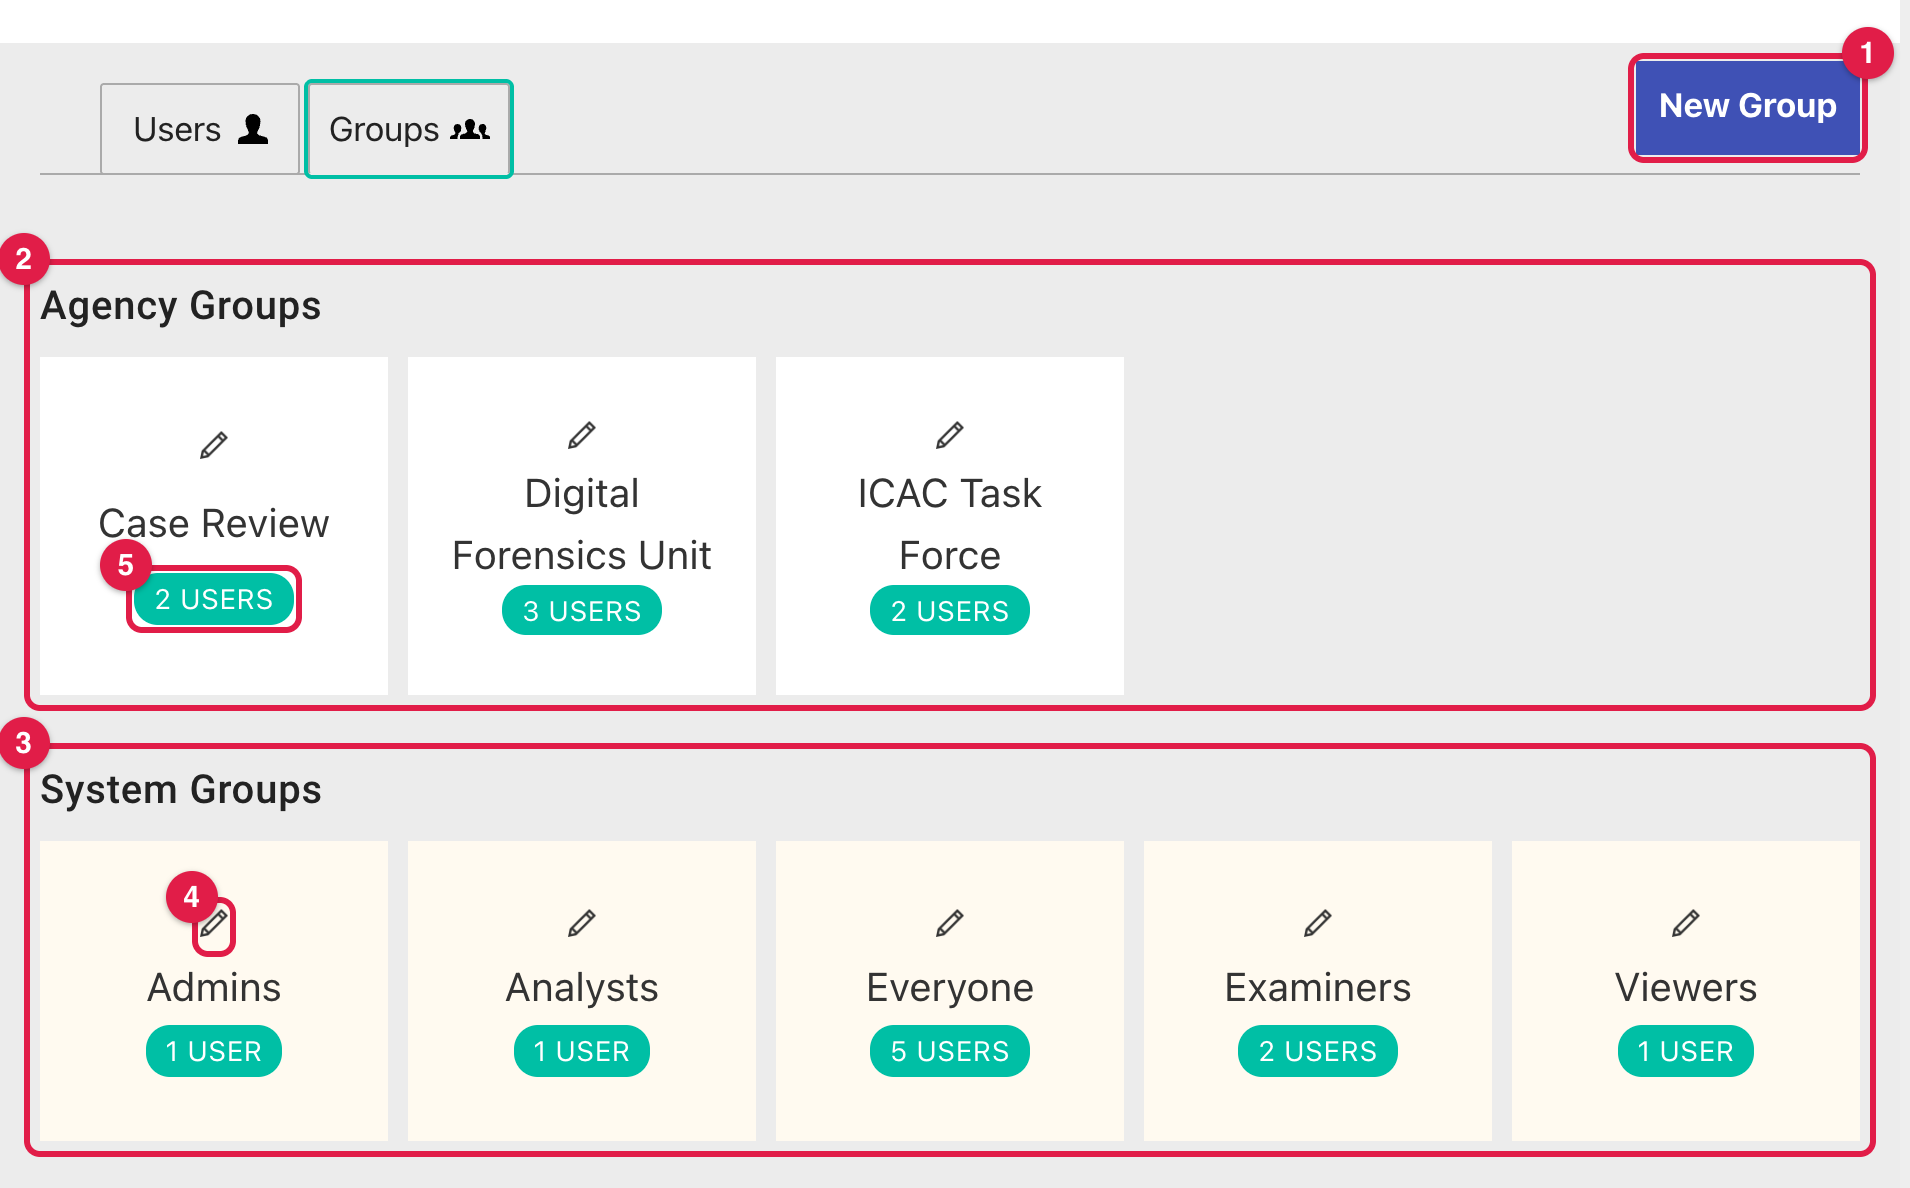
- New Group: enter a name and optional description, select users, and click Save Group.
- Agency Groups: groups you create. Remove a member with the x next to their name.
- System Groups: one per role, plus Everyone. Members follow each user's role.
- Edit a group. For system groups, you can rename the group and its role.
- See a group's members.