External Users
External users sign in to the Lab Submission Manager to submit requests (see Lab Submission Requests). They aren't xBit users and have no access to xBit itself.
Go to Admin > External Users. Only Admins can open it.
The menu item only appears when:
- Email (SMTP) is set up, and
- Allow External User Login is on in
Admin>About / Settings, General tab.
A badge on the menu item counts the users waiting for approval.
External User Manager
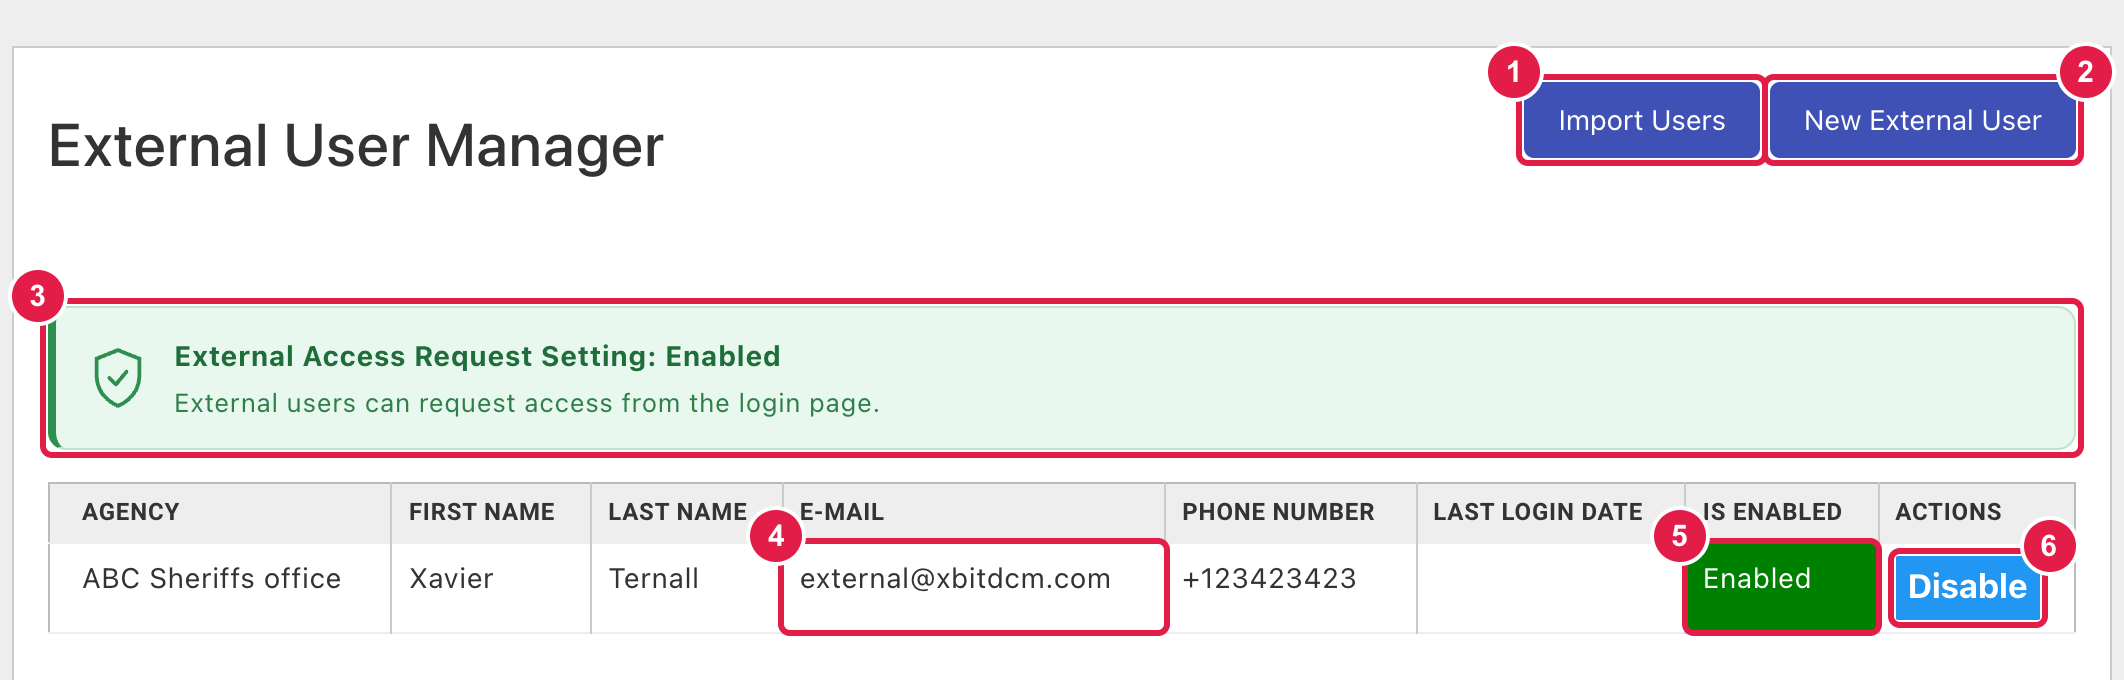
- Import Users: add many users from a CSV file.
- New External User: add one user.
- Whether external users can request access from the sign-in page. Change it with Allow External User Access Request in
Admin>About / Settings, General tab. - Click a row to edit the user.
- The user's status (see below).
- The actions for that status.
When an identity provider is set up, a Source column shows where each user comes from.
Statuses and actions
| Status | Meaning | Actions |
|---|---|---|
| Waiting for Approval | The user clicked Request Access on the sign-in page. | Approve or Reject |
| Enabled | The user can sign in. | Disable |
| Disabled | The user can't sign in. | Enable |
| Rejected | The access request was rejected. | Enabled: enables the user |
New agencies
A user who requests access can type an agency that isn't in xBit. The row then shows New Agency Detected!, and the actions change:
- Add Agency and Approve (or Add Agency and Enable) creates the agency and approves the user in one step.
- The red + button under the agency name only creates the agency.

- The red + adds the detected agency.
- Add Agency and Approve adds the agency and approves the user.
- Reject refuses the access request.
New agencies can be edited later in the Agency Manager.
Add or edit a user
- Click New External User, or click a user's row.
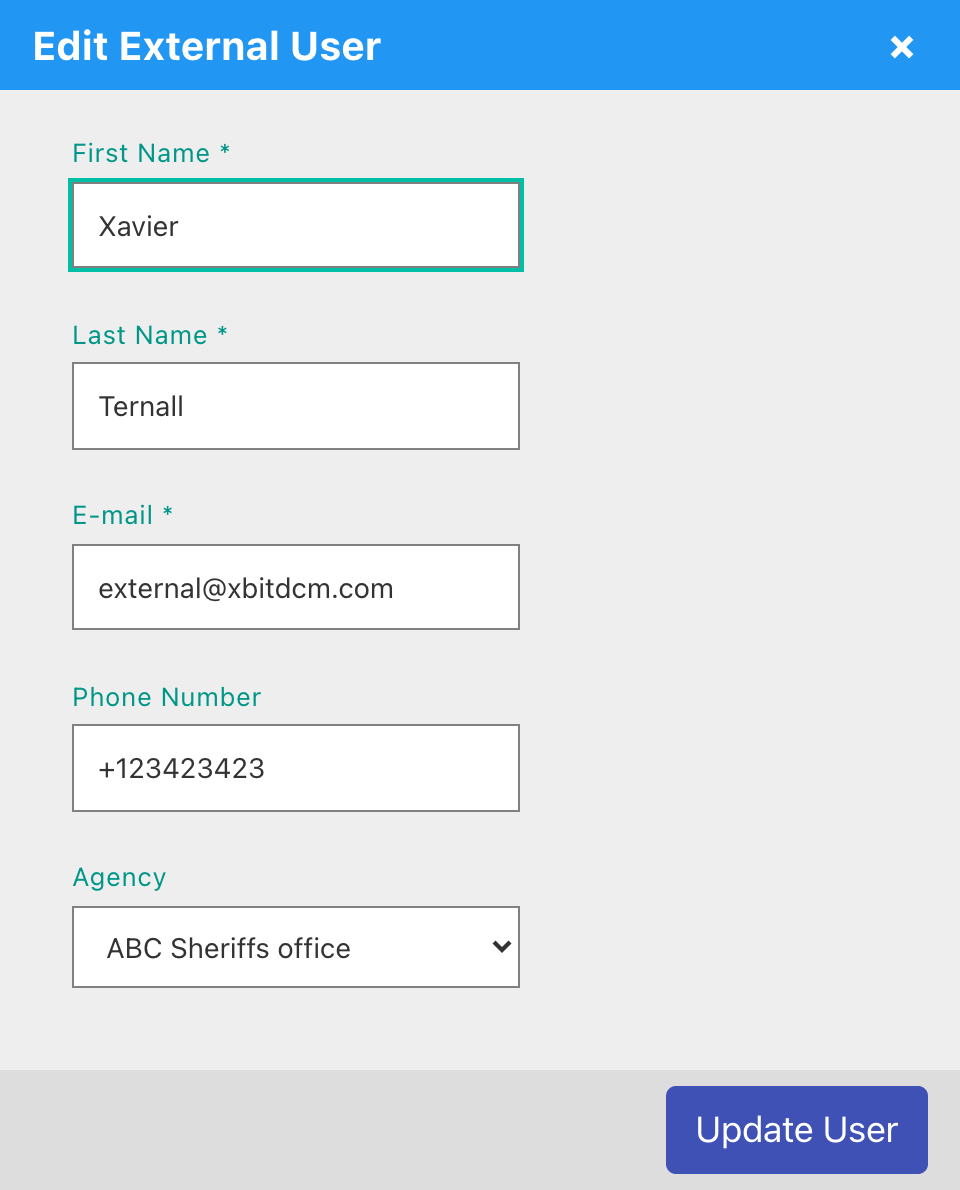
- Enter First Name, Last Name and E-mail (all required), and an optional Phone Number.
- Choose an Agency. To enter a name instead, choose Other and fill in Other Agency.
- Click Create User or Update User.
- Users you create are enabled straight away.
- An e-mail or phone number can only belong to one external user.
- For users from Active Directory, LDAP or Microsoft Entra, fields that come from the directory can't be edited.
Import users
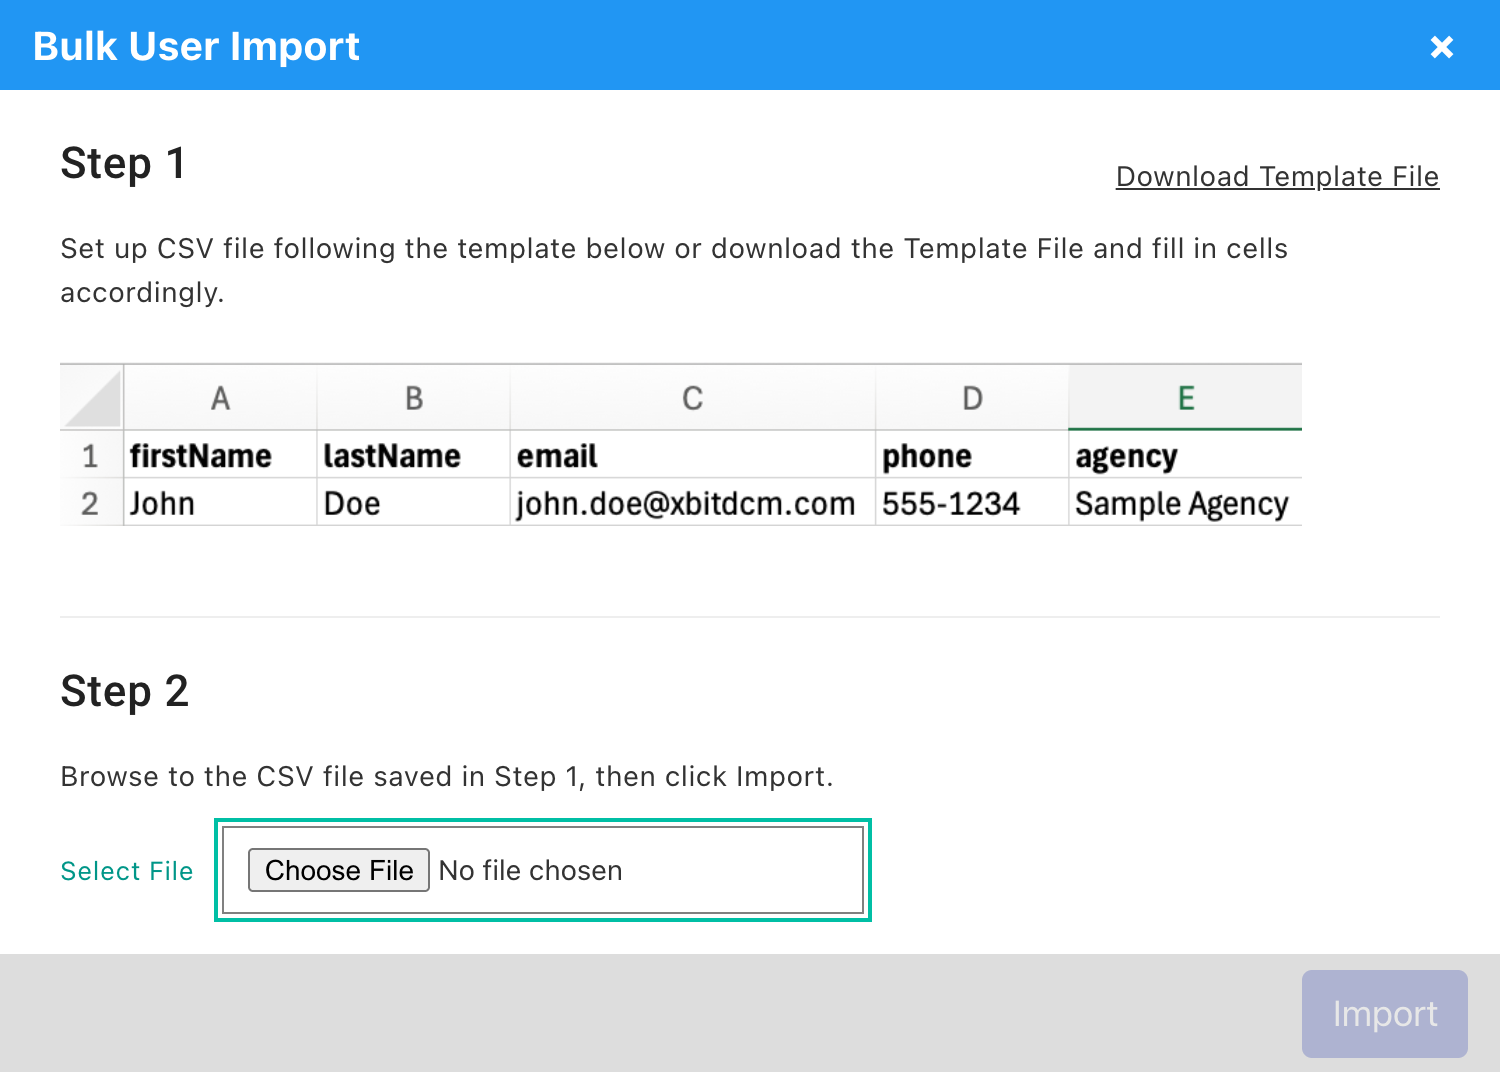
- Click Import Users.
- Step 1: click Download Template File and fill in one row per user.
-
Step 2: click Select File, choose your CSV, and click Import.
-
Columns:
firstName,lastName,email,phone,agency. agencyis matched against agency names and initials. If nothing matches, the user is flagged New Agency Detected!.- Imported users are enabled straight away.
- Rows that fail, for example because the e-mail is already in use, are listed after the import.
⌨️ Tip: Alt+I opens Import Users and Alt+A opens New External User. On a Mac, use Option.