Label Builder
Admins configure case and evidence labels at Admin > Label Builder. Under xBit System Labels, choose Case Label or Evidence Label (or the name previously assigned to it).
Changes save automatically, including field order, sample values and print settings.
Choose the fields
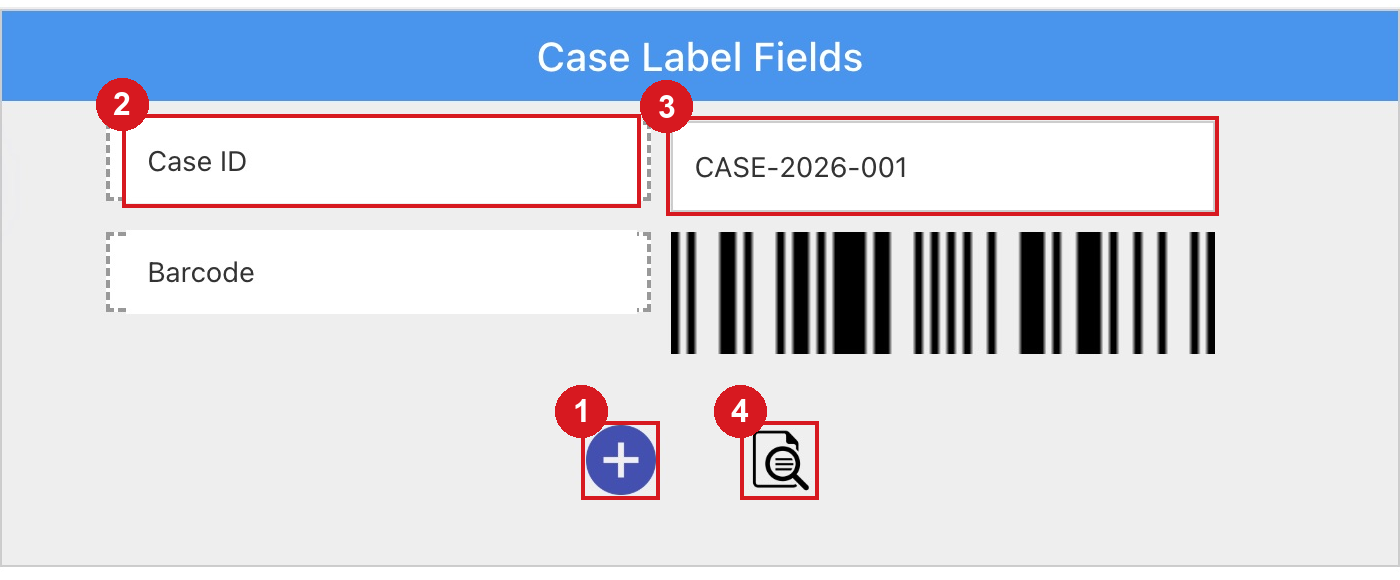
- Add New Field opens the library.
- Reorder the field row or edit its printed wording.
- Provide Data Example supplies a sample for the preview.
- Print Preview checks the layout.
To change a label:
- Click the Add New Field (+) button to open the field library. Case labels use case fields; evidence labels can use case and evidence fields.
- Drag fields into the order you want them printed.
- Edit a field's label to change its wording on the printed label. This does not rename the field on the case or evidence form.
- Enter representative sample values in Provide Data Example, where available, to test the layout. Printed labels use the record's actual values.
- Remove unwanted fields with the delete button on the field row.
Use the Print Preview button beside Add New Field to check the result.
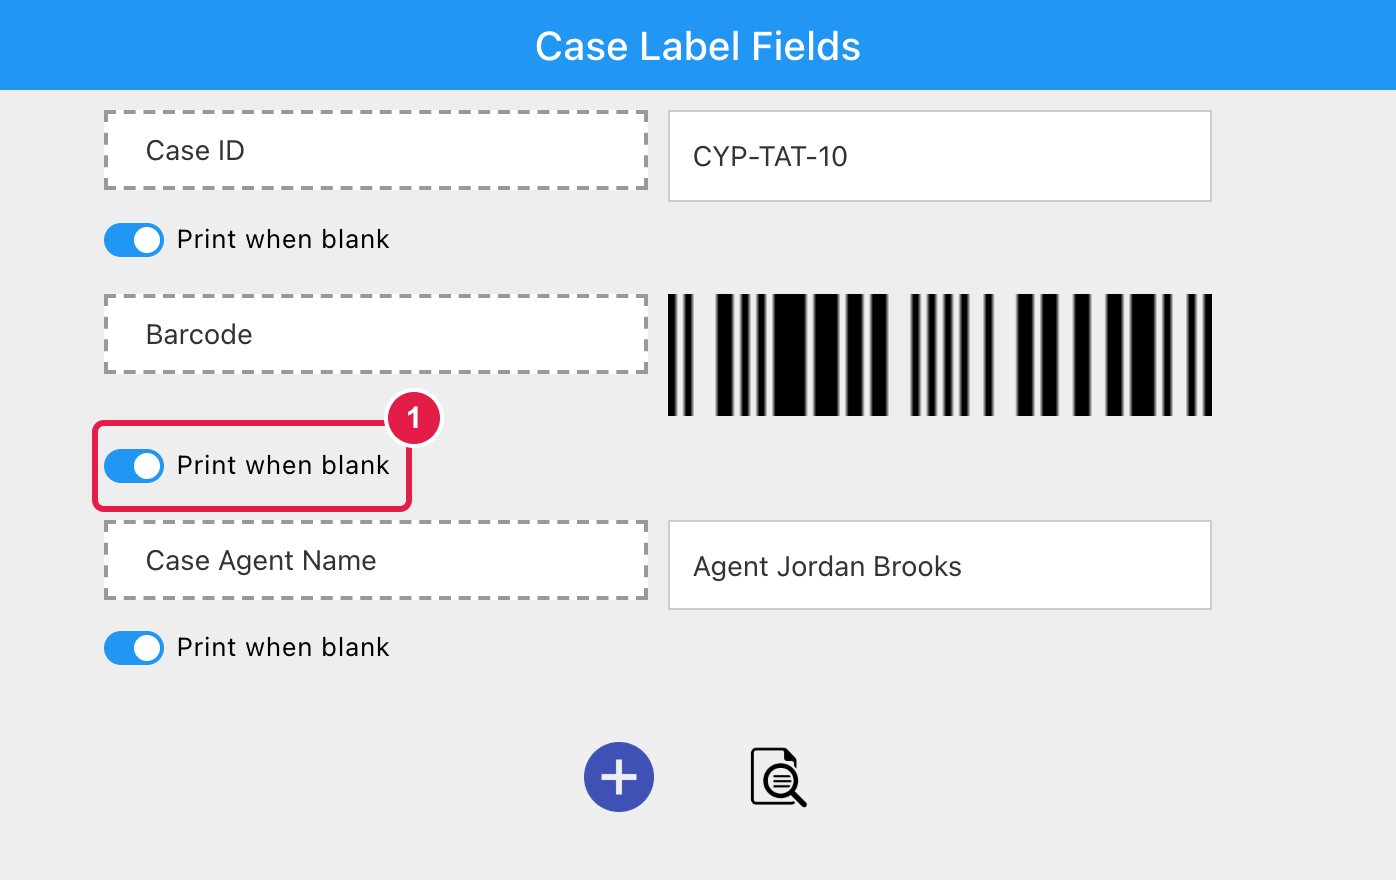
- Print when blank is on by default for every field. Turn it off to leave that line off the label when the record has no value.
Set the label size
Open Print Configuration. Set Label Name to the name users should see when choosing a label to print.
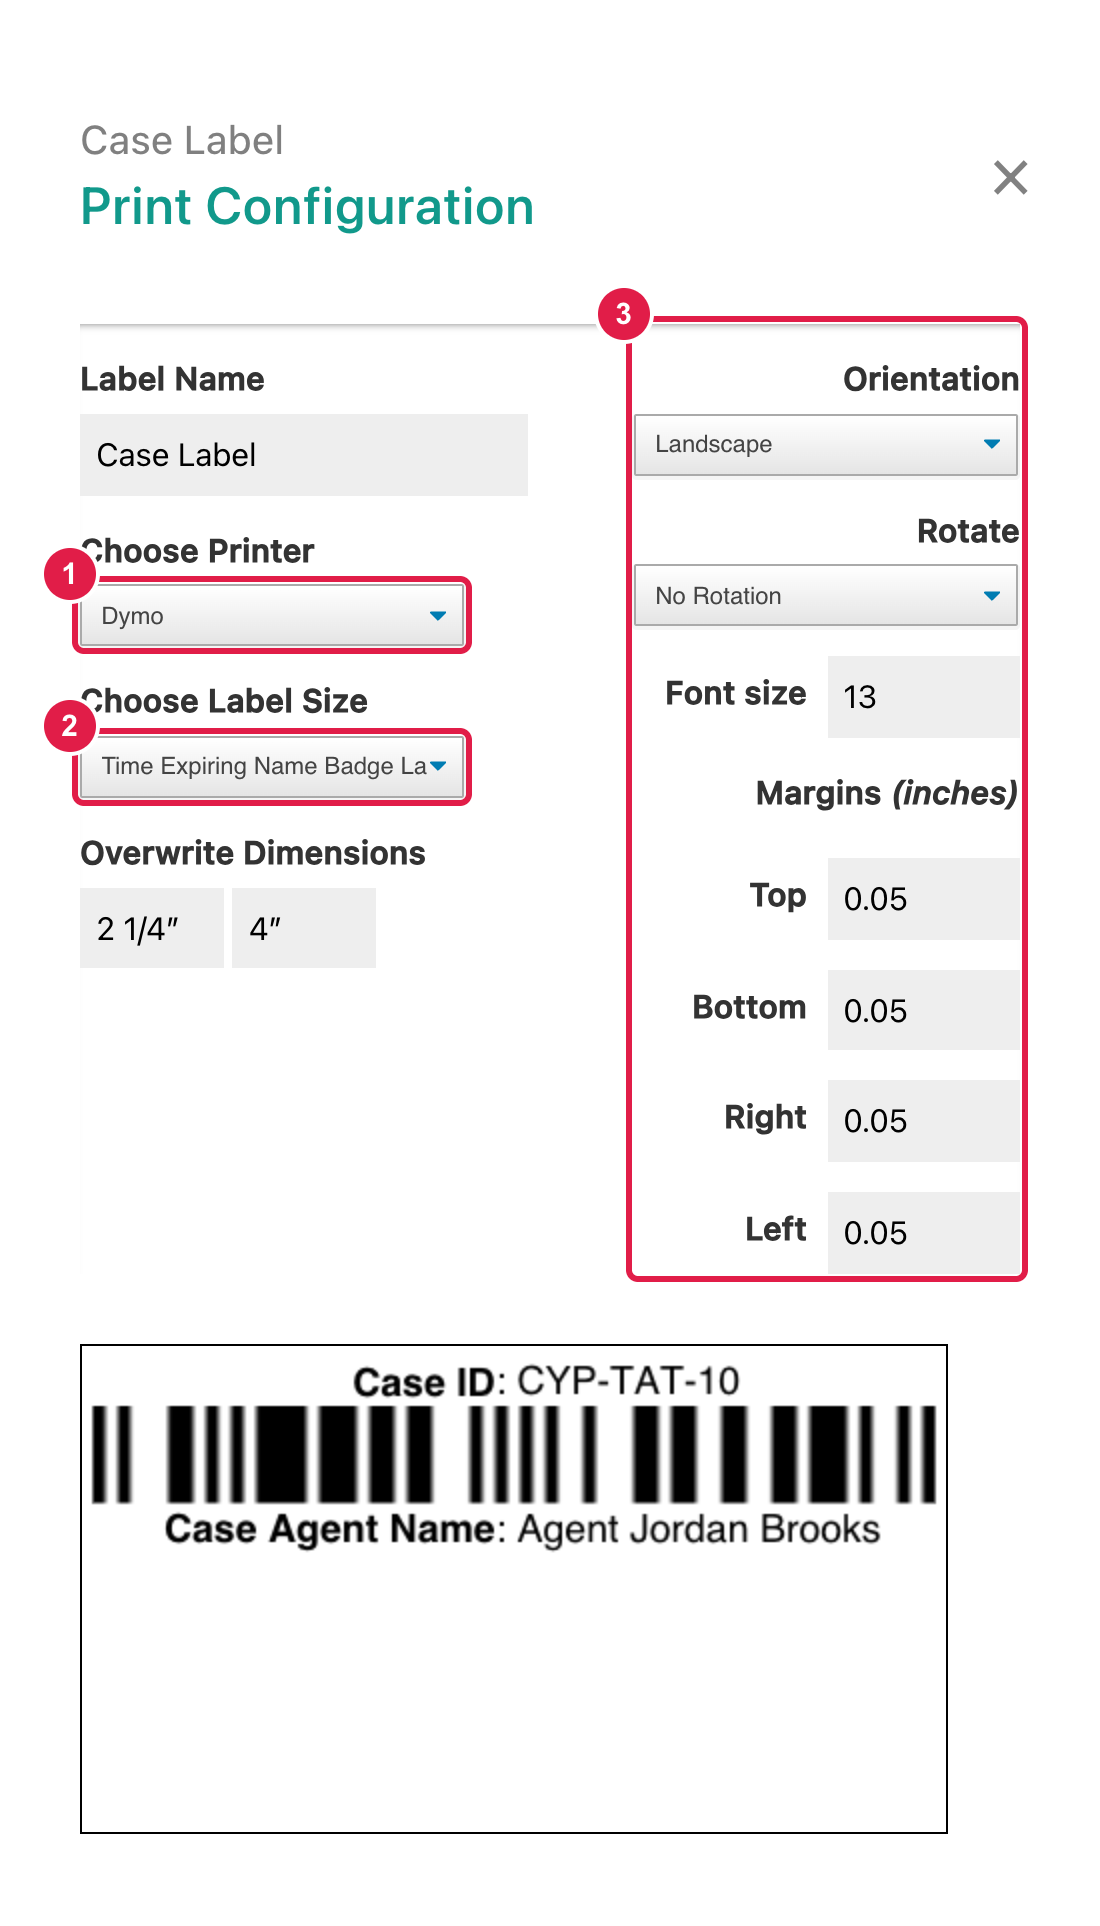
- Choose Printer selects the printer's label-stock options.
- Choose Label Size selects the stock. Use Overwrite Dimensions to enter a custom width and height; use the same units for both, such as
25 mmand50 mm. - Adjust Orientation, Rotate, Font size and Margins to fit the content. Margins are in inches.
Choosing a printer here configures the label layout; install and select your physical printer through your computer's print settings.
Preview and print
- Check the preview with realistic long values, not just short examples. Click the preview label to open it in a new tab.
- Add at least one field before printing; empty configurations are not offered as print options.
- From a case or evidence record, choose the configured label to open its PDF, then print it with the matching printer and paper size.
- If a label includes a barcode and the record has none, xBit offers to add it before printing. See Barcodes.
- Every printed label is logged with who printed it, when, and its values. Bulk prints also appear in each evidence item's audit log.
If the content exceeds the label boundary, xBit warns that it may be truncated. Increase the label size, reduce the font size or margins, or shorten the field labels.
xBit checks this when you print: if the record's values would be cut off, the print tab shows Label Contents Cut Off with Reconfigure, Preview Label and Print anyway. Printing anyway may print clipped text.
For barcode values and scanning, see Barcodes.