Report Builder
Use Admin > Report Builder to create reusable report templates, shared content blocks and the Lab Submission Receipt. These editing screens are available to admins; staff generate reports from cases they can access.
Generate a case report
Open a case and choose Report in its submenu. Choose Report Wizard for an admin-created template, or Default Report for the standard report.
The wizard has up to five steps; steps that the template does not need are skipped:
Choose Template— switch betweenCase ReportsandEvidence Reports. Each tab has its ownRecently Usedlist when available; evidence templates cannot be selected for a case without evidence.Select Evidence— choose the evidence to include, or useSelect Allfor a case report. An evidence report requires one evidence item.Fill in Prompts— enter the text requested by the template. Templates without prompts skip this step.Choose Options— chooseSkip Empty FieldsorPrint Empty Fields, andSkip Empty RowsorPrint Empty Rows. Select the items offered by the template, such as memos, uploads, expenses, assignments, forensic tools, custody and reviews.Print/Preview— inspect the report, then chooseGenerate. Use the step menu to return to earlier choices.
Options depend on the template and enabled features. Evidence report templates do not offer case uploads.
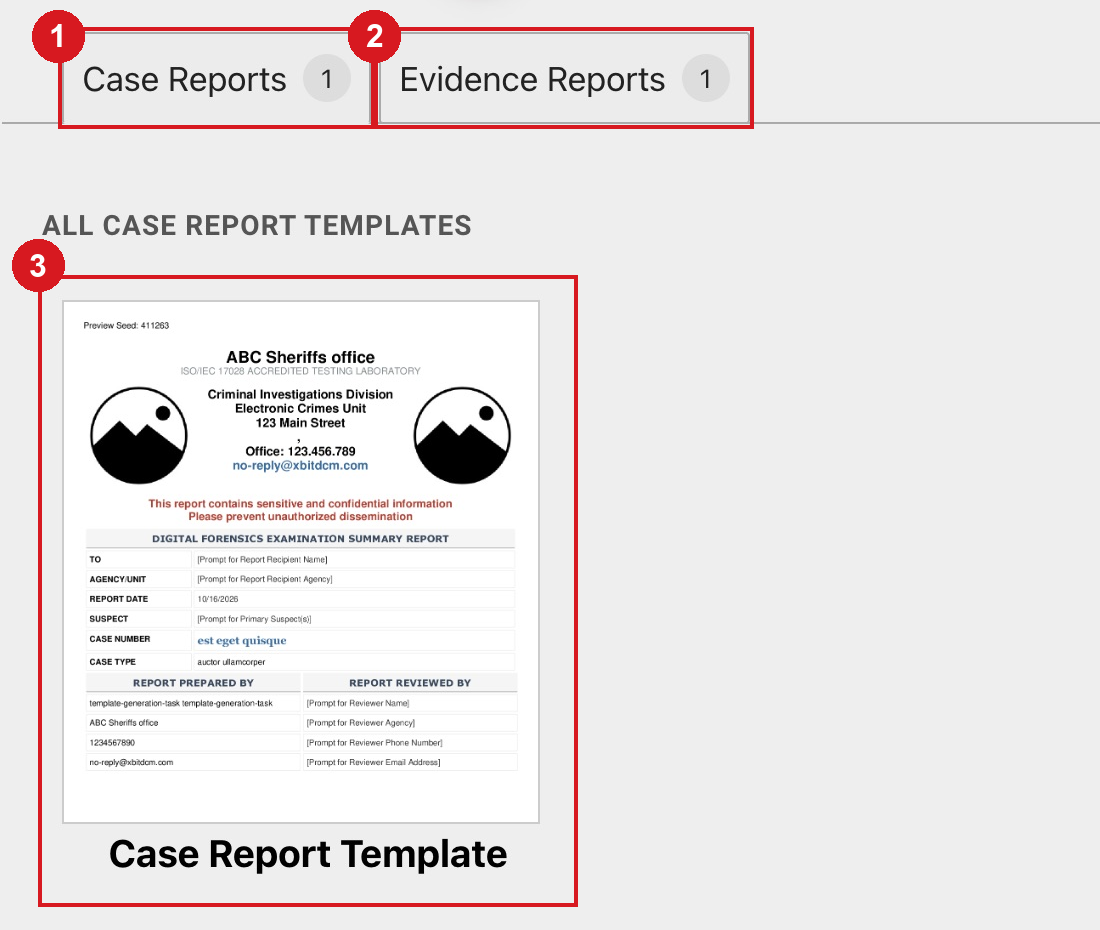
- Case Reports: choose a template for case information and associated evidence.
- Evidence Reports: choose a template for one evidence item.
- Open a template card to continue.
Uploads and ZIP downloads
When the wizard includes Uploads, select the files to include and choose a Zip option:
| Option | Download |
|---|---|
None |
The PDF report without a ZIP archive. |
All |
Requests a ZIP containing the PDF report, images and files. |
Selected |
A ZIP containing the PDF report and only the selected images and files. |
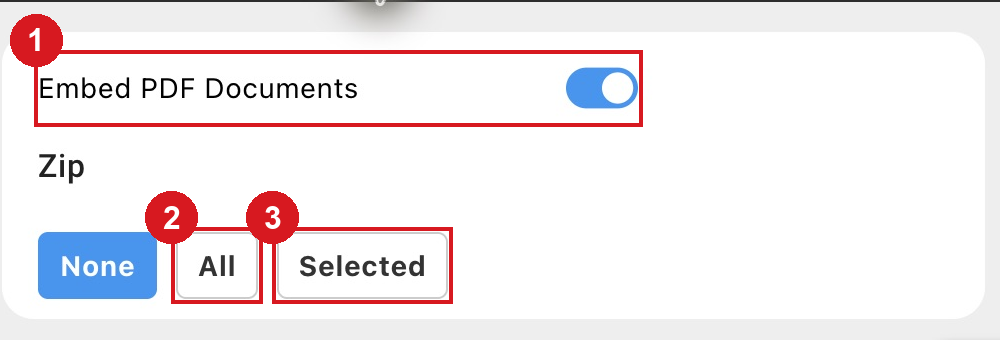
- Embed PDF Documents: embed supported PDF uploads in the PDF report.
- All: request the report and file archive.
- Selected: request an archive of selected uploads.
In this release, both wizard ZIP choices use the selected upload list. Select every required upload even when choosing All, and check the downloaded archive.
Embed PDF Documents embeds supported PDFs in a PDF export; fillable PDFs are flattened. Missing or unsupported files are listed rather than embedded; review any warning beside an upload.
Default Report options
The Default Report has its own options rather than the template wizard. Select evidence and included sections, then choose Word or PDF under Export as.
Print Empty Pages: chooseNoto exclude pages with no content.Zip all files,Zip selected filesorDo not zip: control the accompanying file archive.Reviews: chooseResult Only,Full ReviewsorNothingwhen reviews are available.
Check the preview and the selected uploads before sharing the output.
Report traces
Each case report and Report Builder report writes a trace of every part as it's built. If a report fails, the error offers Download the report trace to send to support: attach it to your support ticket.
Admins find the traces of the last 24 hours in Admin > Report Traces, with who ran each report, on which case, and how long it took.
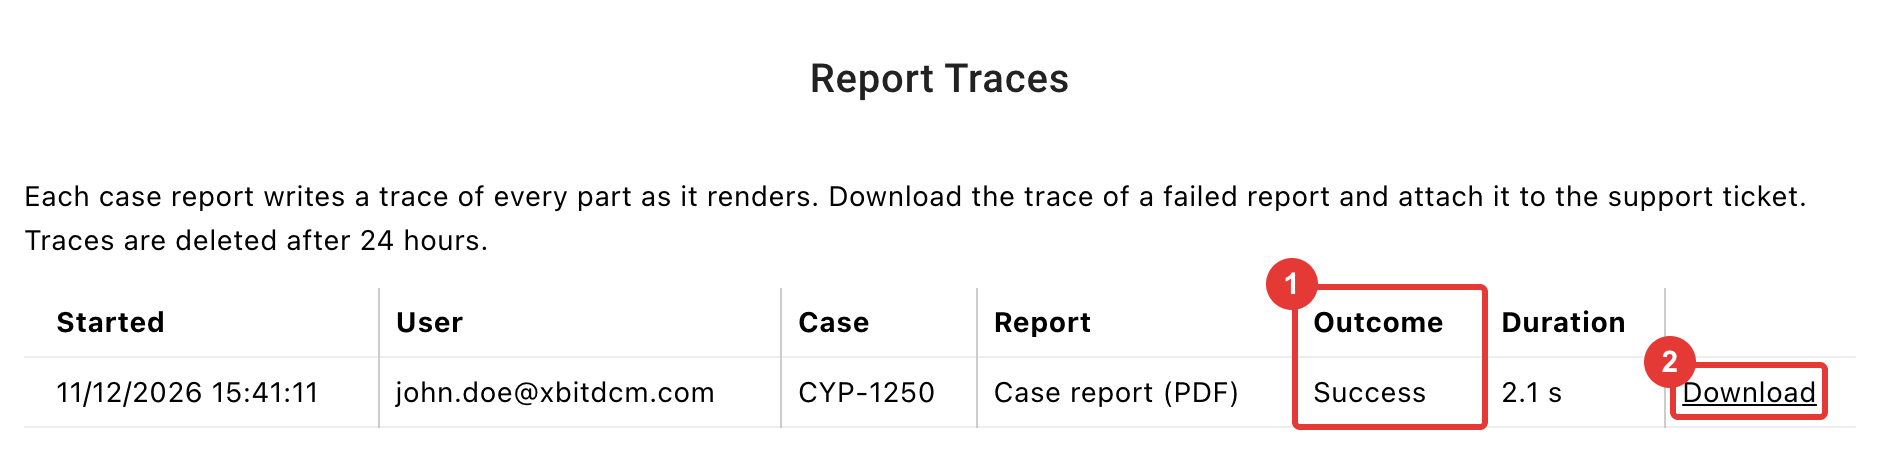
- Outcome: Success, Failed or Did not finish.
- Download: the trace to attach to your support ticket.
Traces are deleted after 24 hours. To keep traces of reports that succeeded too, turn on Keep Traces of Successful Reports in About / Settings.
Create or edit a template
A template sets the report's overall structure. Its blocks hold rows and columns of fields; the Content Library stores blocks that several templates can share.
- Open
Admin>Report Builder>Template Gallery. - Filter using the left sidebar, and switch between
Grid ViewandList Viewas needed. - Open an existing template, choose
Copyto start from one, or chooseAdd New Report Template. - Set
Template NameandTemplate Descriptionso staff can identify the report. - Open
Content Libraryin the builder sidebar and choose blocks for the report. - Use
Sort Blocksto reorder them, then checkPreview.
Default templates can be copied, but their Delete action is unavailable. Editing a template changes future reports that use it.
Template names and descriptions save when you leave the field; layout changes and setting switches save as you use them. Formatting changes in the side panel require Save; check Preview when finished.
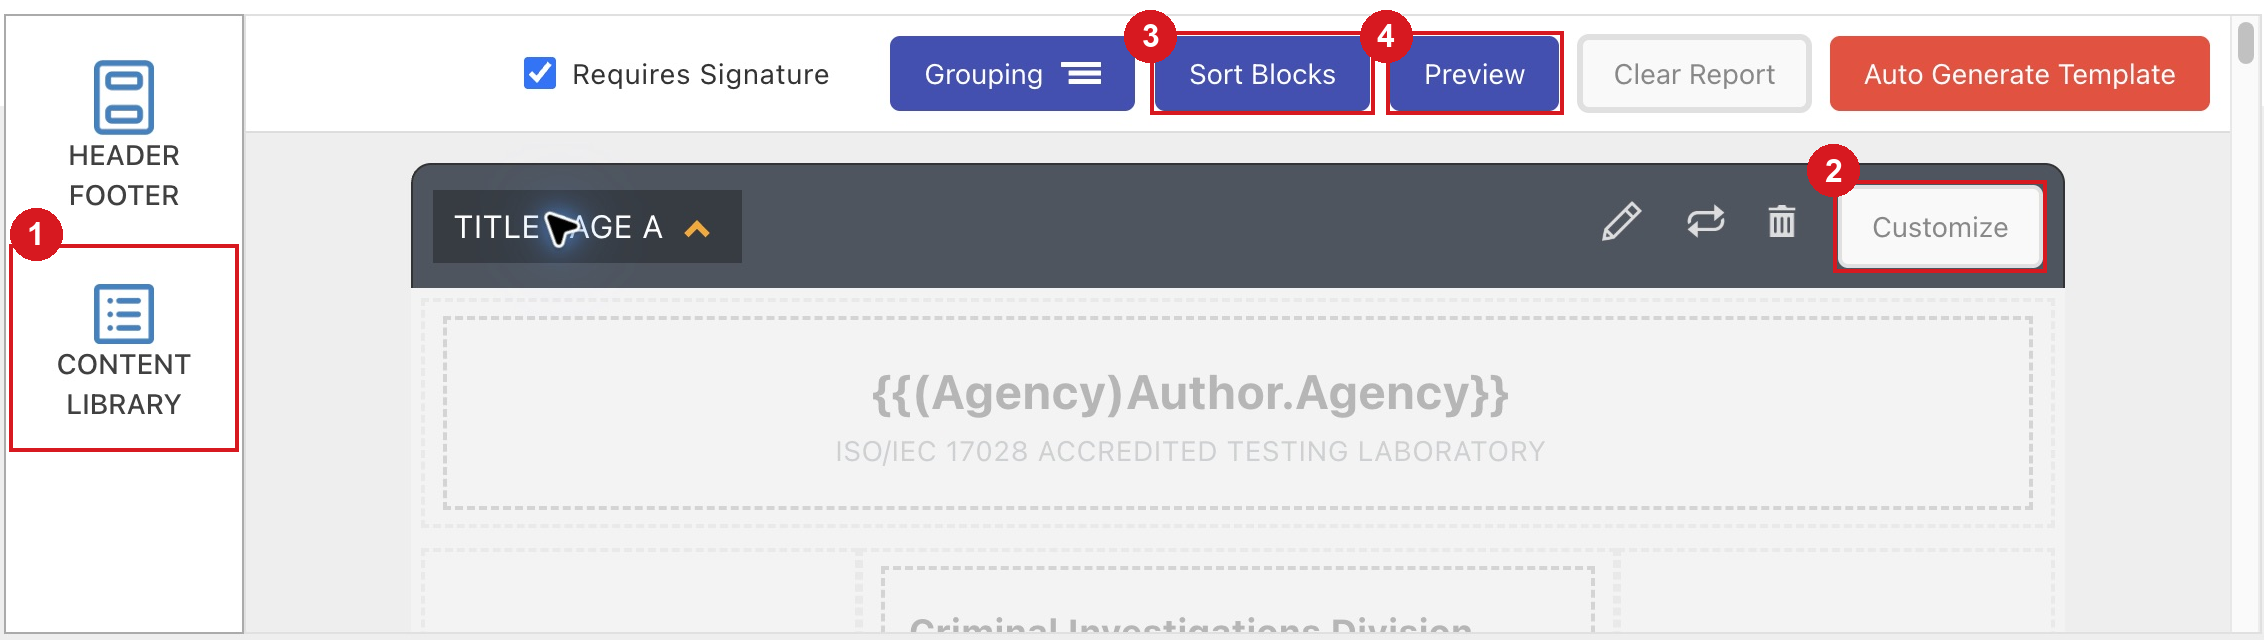
- Content Library: add a reusable block.
- Customize: make this block local to the template.
- Sort Blocks: reorder the report sections.
- Preview: check the template output.
Shared and customized blocks
A linked Content Library block is shared: editing the original changes every template using that block. The library identifies blocks IN USE and lists the templates that use them; remove those links before deleting the library block.
Choose Customize to unlink a block and edit a local copy in one template. Save to Content Library creates a reusable library block and links the template to it.
Use Switch Block to replace a section's content with another block, or Remove to remove it from the template. Replacement and removal display confirmation prompts; replacing a block discards its current content.
Page layout
Header Footerenables content repeated on each page.Requires Signatureadds a signature section.Groupingselects blocks to group under evidence.Include Evidence Type Data, when offered, includes fields from the appropriate evidence-type report block, such as the Mobile Phone block.Show Evidence section at the end of the reportmoves evidence after the standard sections.
Build a Content Library block
Open Admin > Report Builder > Content Library. Open a block to edit it, use Copy to make a variation, or choose Add to Content Library for a new block.
- Choose the block type and give it a recognizable
Content NameandDescription. - Choose
Add Rowand select a column layout,Spacer RoworPage Break. - Use
Add Fieldinside a cell to choose a data field or another content type. - Use the pencil control to format a cell, then
Savethe sidebar changes and checkPreview.
Available data fields depend on the block type and your configured forms; disabled fields and USSS stats fields are excluded. For example, case and evidence blocks offer their form fields; other block types offer memo, upload, expense, custody, forensic software, assignment, review or author fields.
| Content type | Use |
|---|---|
Short Text, Rich Text Field |
Fixed wording, with formatting for rich text. |
Prompt |
Ask the report's author for text during generation. |
Current Date, Page Number |
Generated date or page numbering. |
Image, Agency Logo |
An image or the configured agency logo. |
Empty |
A blank cell for the layout. |
Format Cell controls background, borders, font, label display and label alignment. A customized template block can also use Format Section to style its section.
A field added or removed in Form Builder may require the corresponding report block to be updated. Check the relevant block and preview after changing a form.
Lab Submission Receipt
Open Admin > Report Builder > Lab Submission Receipt to edit the receipt used by Request Submission. This is a separate builder, rather than a case-report template in the wizard.

- Add Row: extend the receipt layout.
- Auto Generate Report: replace its content from request-enabled form fields.
- Preview: check the receipt output.
Configure the receipt content:
- Add rows and fields under
RequestandEvidence; configure the header, footer andRequires Signatureas needed. - Request fields include
Request ID,Submitted Date, the configured Case ID field, and eligible case-form fields. - Evidence fields include
Evidence Nameand eligible evidence-intake fields.Include Evidence Type Dataincludes the matching evidence-type report fields. Auto Generate Reportreplaces the current content with fields markedIn Request Submissionin Form Builder.Clear Reportremoves the fields; both actions require confirmation.- Use
Previewto check the receipt after changing its layout.
The request field chooser also offers Status Entry Date, Status Type Code and Status Note from the linked case's current status. Adding them lets external users see that status information on generated receipts; only include information suitable for external visibility.
Prompt is not offered in the Lab Submission Receipt builder. Use request/evidence fields and fixed text for receipt content.